Spooky Eyeball Cake Pops Recipe for a Fun Halloween Party Treat

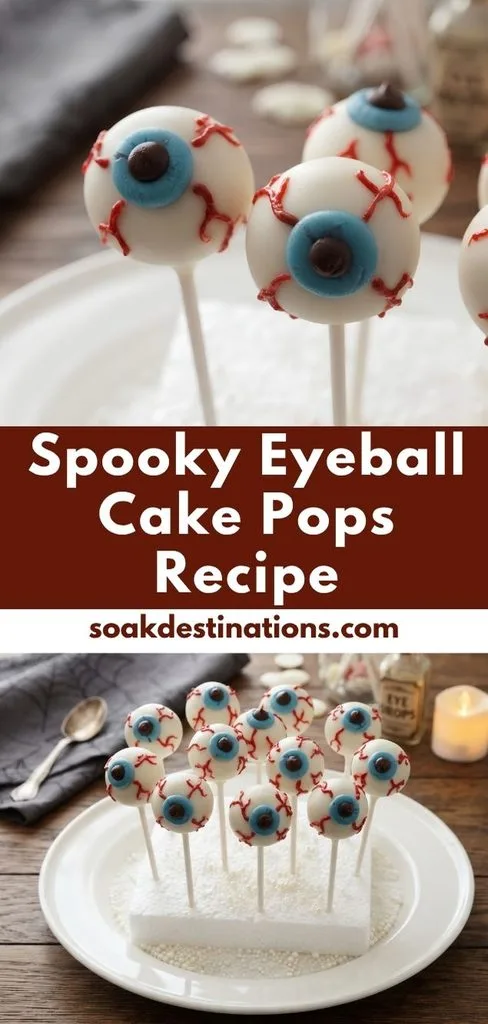
I made this Spooky Eyeball Cake Pops Recipe for Halloween, and they turned out to be such a fun dessert. I loved how a simple chocolate cake could become a creepy little edible eyeball with just a few decorations.
The soft cake and buttercream center gives each pop a rich, chocolatey bite. I also enjoyed piping the blue pupils and red veins because every eyeball can look slightly different. If you are looking for a Halloween cake pops recipe that gets attention, this is one I would happily make again.
Cooking Time
- Prep Time: 2 hours
- Cooking Time: 30 minutes
- Total Time: 2 hours 30 minutes
This recipe makes about 30 cake pops, making it suitable for a Halloween party, treat table, or treat bags.
Ingredients
Chocolate Cake
- 7 ounces all-purpose flour: Provides the main structure for the chocolate cake.
- 1 cup sugar: Adds sweetness and helps create a tender cake.
- 3 ounces cocoa powder: Gives the cake its deep chocolate flavor.
- 1 teaspoon baking soda: Helps the cake rise properly.
- ½ teaspoon baking powder: Adds additional lift to the cake.
- ½ teaspoon salt: Balances the sweetness and chocolate flavor.
- 1 large egg: Helps bind the cake ingredients together.
- ½ cup buttermilk: Adds moisture and tenderness to the cake.
- ¼ cup vegetable oil: Keeps the baked cake soft and moist.
- ½ teaspoon vanilla extract: Adds a gentle background flavor.
- ½ cup freshly brewed coffee: Deepens the chocolate flavor; add it carefully while hot.
Buttercream Frosting
- 8 ounces unsalted butter, softened: Creates the creamy base for the frosting.
- 2 cups powdered sugar: Sweetens and thickens the buttercream.
- ½ teaspoon vanilla extract: Adds extra flavor to the frosting.
- 1½ teaspoons heavy cream: Helps make the buttercream smooth and fluffy.
Candy Melts and Chocolate
- 24 ounces white candy melts: Forms the smooth white eyeball coating.
- Blue food coloring: Colors a small portion of the white coating for the iris.
- 2–3 ounces chocolate chips: Creates the dark center of each eye.
- 2–4 ounces red candy melts: Makes the spooky bloodshot veins.
- 30 cake pop sticks: Hold each finished eyeball for easy serving.
Note: serves several — this quantity makes approximately 30 cake pops.
Equipment You Need
- 9-inch baking pan: Used to bake the chocolate cake.
- Parchment paper: Lines the pan and baking sheet for easier handling.
- Mixing bowls: Used to combine the cake and frosting ingredients.
- Whisk: Helps combine the dry and wet cake ingredients smoothly.
- Stand or hand mixer with paddle: Creams the butter and blends the frosting.
- 2-cup liquid measuring glass: Makes dipping the cake pops into melted coating easier.
- Baking sheet: Hold the shaped cake balls while they chill.
- Cake pop sticks: Turn the cake balls into easy-to-hold treats.
- Piping bags: Allow you to add the blue, black, and red decorations neatly.
- Number 2 round piping tip: Creates thin red vein details.
- Cake pop stand, box, or Styrofoam: Keeps the pops upright while the coating dries.

How to Make Spooky Eyeball Cake Pops Recipe?
Making these cake pops is a little more involved than making a regular cake, but each stage is simple. I find it easier to bake the cake ahead so it is completely cool when I begin assembling the pops. The most important part is keeping the cake balls chilled and upright while you decorate them.
Bake the Chocolate Cake
Start by heating your oven to 350°F. Line a 9-inch pan with parchment paper so the baked cake can be removed easily. In one bowl, whisk together the flour, sugar, cocoa powder, baking soda, baking powder, and salt. In another bowl, whisk the egg, buttermilk, vegetable oil, and vanilla.
Pour the wet mixture into the dry ingredients and combine them well. Slowly whisk in the freshly brewed hot coffee. The batter will be quite thin, so do not worry. Pour the batter into the prepared pan and bake for about 25–30 minutes, or until the cake is done. Let it cool completely before moving to the next stage.
Prepare the Buttercream
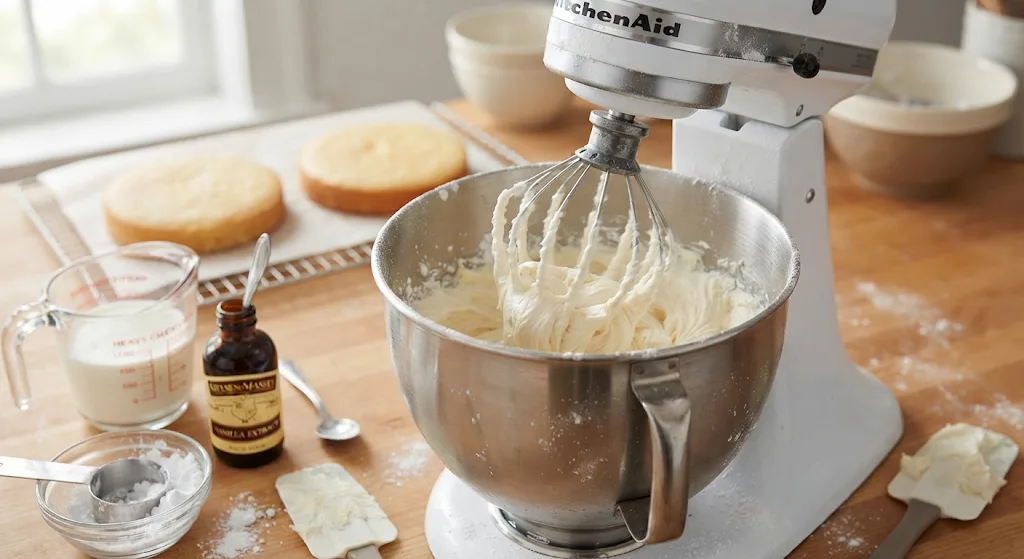
While the cake cools, make the buttercream. Place the softened butter in a mixer bowl and cream it until smooth. Gradually add the powdered sugar while mixing. Continue until the mixture is well combined and creamy. Add the vanilla and heavy cream, then mix until the frosting becomes fluffy and smooth.
Crumble and Mix the Cake
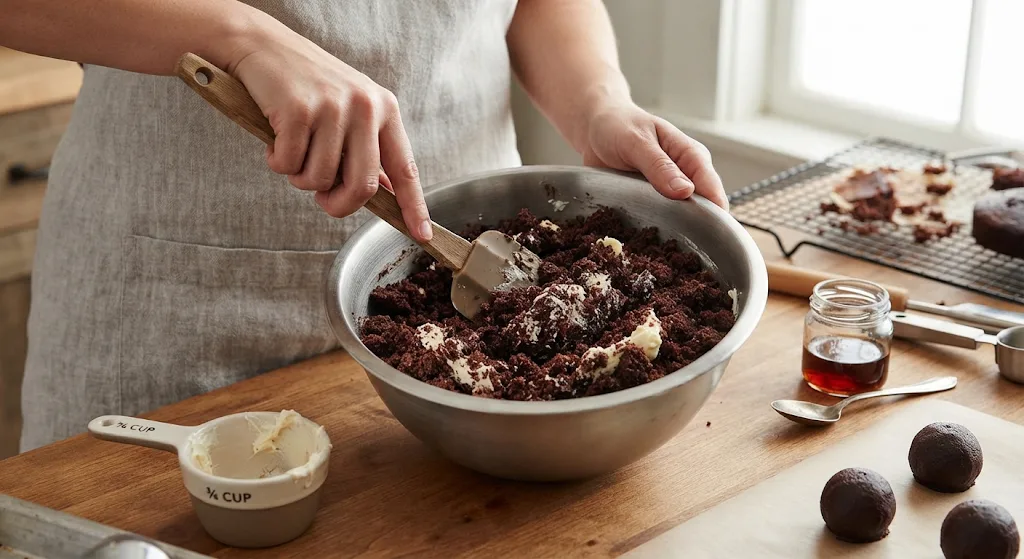
Once the chocolate cake has cooled completely, crumble it into a medium bowl. Break it down into fine crumbs so the frosting can distribute evenly. Add ¾ cup of the prepared buttercream to the crumbs.
Mix everything together until the frosting is fully incorporated and the mixture holds together. Do not rush this stage. The finished mixture needs to be moist enough to roll into balls without becoming overly soft.
Shape the Cake Balls
Line a baking sheet with parchment paper. Take about 1–2 tablespoons of the cake mixture for each pop. Roll the mixture between your hands until you have smooth, rounded balls. Try to keep the portions similar so the finished eyeballs look consistent. Place each cake ball on the parchment-lined baking sheet. Continue until all the mixture has been shaped.
Chill the Cake Balls
Refrigerate the cake balls for at least 1 hour. This chilling time helps the soft cake mixture firm up before dipping. I would not skip this step because chilled cake balls are easier to handle. They are also less likely to lose their shape when you add the sticks and coating. While they chill, prepare your workspace, sticks, melted coatings, and decorating bags.
Prepare the White Coating
Melt the white candy melts according to the package directions. A 2-cup liquid measuring glass works well because its shape makes dipping easier. Reserve about 2 ounces of the white candy melts before coloring the rest.
You will use this reserved portion to create the blue eye details later. Keep the melted coating smooth and ready for dipping. Work carefully because the chilled cake balls will be delicate.
Add the Cake Pop Sticks
Dip the end of each cake pop stick about ½ inch into the melted white coating. Insert the coated end approximately halfway into a chilled cake ball. The small amount of coating acts as an anchor between the stick and cake. Place the pop upright while the coating sets. Repeat with all the cake balls before moving on to the full coating.
Coat the Eyeballs
Dip each cake ball into the melted white candy coating. Gently shake off excess coating so the surface stays smooth instead of becoming too thick. Immediately place each pop upright in a box or piece of Styrofoam so the coating can dry without creating a flat bottom. Because the cake balls were chilled beforehand, the white coating should set fairly quickly.
Create the Eyes
Melt the chocolate chips and red candy melts separately. Put each melted ingredient into its own piping bag. Color the reserved white candy melts blue, then transfer the blue coating to another piping bag. Cut a small opening at the end of each bag. Pipe a blue circle in the center of every white cake pop. Allow that detail to set before adding the darker center.
Add the Pupils and Veins
Once the blue circles have dried, pipe a smaller chocolate circle inside each one. This creates the dark center that makes the eyeball design recognizable. Now comes the fun part. Pipe red lines around the white surface to create the bloodshot veins.
I like the fact that the veins do not need to look identical. Let the lines branch and curve in different directions for a more dramatic Halloween appearance.
Let the Cake Pops Set
Allow the decorated cake pops to dry completely before packaging or storing them. The original recipe recommends allowing about 1 hour after decorating. Once the coating and decorations have set, place the eyeball cake pops in an airtight container.
Additional Tips for Making This Recipe Better
- I recommend baking the cake the night before when possible. It gives the cake plenty of time to cool before I begin crumbling it.
- I always chill the shaped cake balls for at least an hour because the firmer texture makes dipping much easier.
- I dip the end of each stick into a little melted coating before inserting it into the cake ball. This helps keep the pop attached.
- I use a 2-cup measuring glass for dipping because its narrow, deeper shape makes coating the cake balls easier.
- I let the white coating dry before piping the eye details. This keeps the circles and veins much cleaner.
- I use a small piping opening for the red veins because thin lines give the eyeballs a more detailed appearance.
- I keep the eyeballs upright while drying. This helps prevent the bottoms from becoming flat.
Common Mistakes to Avoid
- Skipping the chilling step: I have found that soft cake balls are harder to dip, so I chill them for at least 1 hour first.
- Using too much coating on the stick: I only need a small amount on the stick before inserting it halfway into the cake ball.
- Letting excess coating remain: I gently shake off extra white coating before placing each pop upright.
- Decorating before the coating dries: I wait until the white shell has set so the blue, chocolate, and red details stay defined.
- Making every vein identical: I prefer varied red lines because they make the eyeballs look more naturally spooky.
How to Serve Spooky Eyeball Cake Pops?
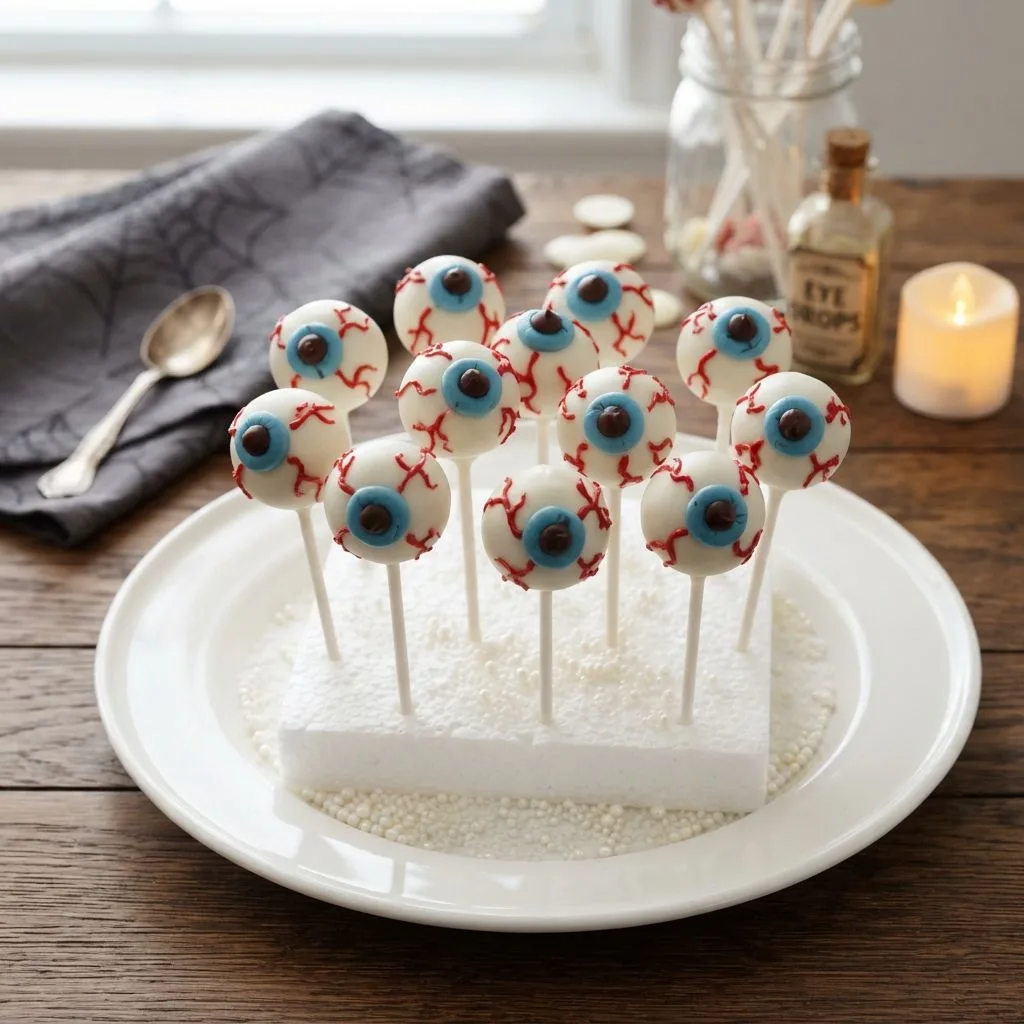
These cake pops are designed to be served upright on their sticks, making them easy for guests to pick up. I like displaying several together because the different red vein patterns make the collection look more dramatic.
For Halloween parties, arrange the pops on a decorated dessert table or place individual cake pops into treat bags. You can also stand them in a block of Styrofoam or a suitable cake-pop holder so the white eyeballs remain visible.
For an especially creepy presentation, group the pops together with the blue irises facing different directions. The red veins provide the main decorative accent, so no additional garnish is necessary.
Variations
- Different cake flavor: Keep the same cake-pop method but experiment with another cake flavor if you want to change the center.
- More intense chocolate flavor: Use the chocolate cake base and chocolate center together for a stronger cocoa profile.
- Extra-spooky decoration: Add more red vein lines or make them longer and more irregular.
- Different eye colors: Instead of blue, color the reserved white candy coating another shade for a different Halloween character.
- Coffin cake pops: Use the same cake-pop concept as inspiration for another Halloween shape, such as coffin cake pops.
- Eyeball lava cake inspiration: If you enjoy dramatic Halloween desserts, the eyeball theme can also inspire an eyeball lava cake presentation, although that would be a different recipe.
Nutritional Information
The supplied recipe does not provide an official nutrition panel, so exact values can vary depending on ingredient brands, coating amounts, and how much frosting is incorporated into each pop.
- Calories: Not specified in the source recipe.
- Protein: Not specified in the source recipe.
- Carbohydrates: Not specified in the source recipe.
- Fat: Not specified in the source recipe.
Make Ahead and Storage
Make Ahead
I recommend baking the chocolate cake the night before if you want to spread the preparation over two days. The original recipe specifically suggests this approach because the cake will already be completely cool when you are ready to make the cake pops.
The shaped cake balls can also be chilled for at least 1 hour before dipping, which makes the decorating process easier.
Storage
After decorating, allow the cake pops to dry completely before packaging them. The source recipe recommends waiting about 1 hour before placing them in an airtight container.
The supplied recipe does not specify an exact number of days for freshness, so I would not assign a storage period that is not provided in the source.
Reheating
These are finished cake pops rather than a dessert intended to be reheated. The supplied recipe does not give reheating instructions, so reheating is not part of the preparation method.
Freezing
The supplied recipe does not provide freezing instructions or a recommended freezer storage period. For that reason, freezing should not be presented as part of the original method.
Why You’ll Love This Recipe?
These spooky cake pops combine a rich chocolate center with a dramatic Halloween design. I especially enjoy how much personality you can give each individual eyeball.
- They make a memorable Halloween dessert: I love how quickly the eyeball design turns an ordinary cake pop into a themed party treat.
- The chocolate center is rich and soft: I get a tender chocolate cake texture mixed with creamy buttercream in every bite.
- The decorating is creative: I can make the blue iris, dark center, and red veins as simple or dramatic as I like.
- They are easy to display: I can keep the pops upright on their sticks, making them practical for a dessert table or treat bags.
- They make about 30 pops: I find the quantity useful when I need plenty of individual treats for a Halloween gathering.
FAQs
How do you make Halloween cake pops?
Start with the chocolate cake, mix the cooled crumbs with buttercream, roll the mixture into balls, chill them, add the sticks, and coat them with white candy melts. Finish with blue, chocolate, and red candy-melt decorations.
Can I make eyeball cake pops ahead of Halloween?
Yes, the cake can be baked the night before to make the preparation easier. The source recipe also recommends chilling the formed cake balls for at least 1 hour before dipping.
How do I keep eyeball cake pops from falling off the sticks?
I dip each stick about ½ inch into melted coating before inserting it halfway into the cake ball. This creates a coating layer that helps secure the stick.
How do I make the red veins on eyeball cake pops?
I melt the red candy melts and place them in a piping bag with a small opening. Then I pipe thin, irregular lines across the white coating to create the bloodshot effect.
Can I use these ideas for other Halloween cake pops?
Yes. The same cake-pop technique can inspire other Halloween cake pop ideas, including different shapes and decorations. Coffin cake pops are another themed idea that can use the general cake-pop concept.