Cobweb Chocolate Tart Recipe: A Spooky, Silky Halloween Treat

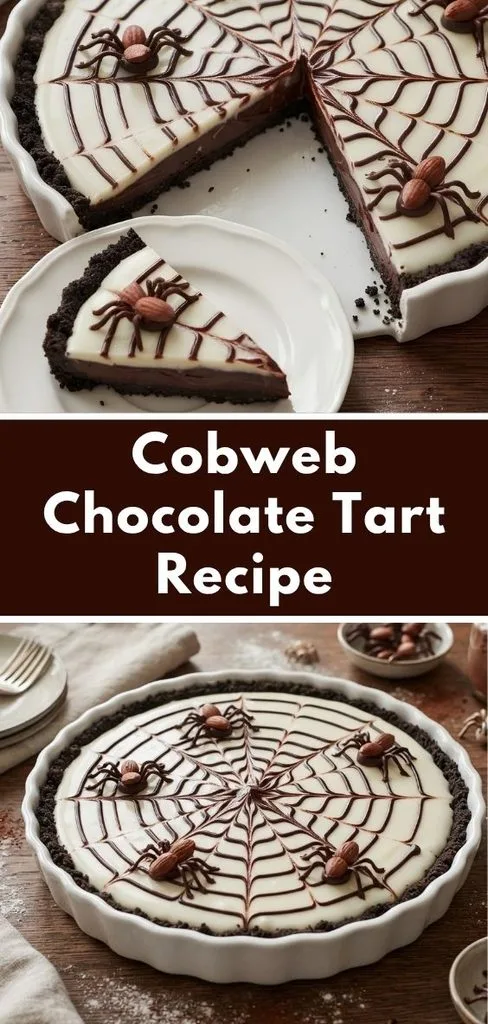
I made this Cobweb Chocolate Tart Recipe when I wanted a Halloween dessert that looked impressive without making me spend hours baking. I loved how the crunchy Oreo crust balanced the smooth, rich chocolate filling.
The white chocolate topping gave me the perfect canvas for creating a simple spiderweb design. I also had fun making the little chocolate spiders because they made the tart feel extra festive. If you love chocolate Halloween desserts, this easy no-bake tart is one I think you will really enjoy.
Cooking Time
- Prep Time: 20 minutes
- Cooking Time: 10 minutes
- Total Time: 2 hours 30 minutes
The longer total time mainly comes from chilling and setting the different chocolate layers.
Ingredients
Chocolate Spiders
- 100 g dark chocolate, melted — Use good-quality chocolate for neat piping and a firm finish.
- 5 chocolate-covered almonds — These form the raised bodies of the edible spiders.
Oreo Crust
- 270 g Oreos — Keep the cream centers in; they help create a cohesive cookie crust.
- 85 g unsalted butter — Melted butter binds the cookie crumbs and helps the crust set.
Chocolate Ganache Filling
- 200 g dark bittersweet chocolate, chopped — Adds deep chocolate flavor without making the filling overly sweet.
- 200 g milk chocolate, chopped — Gives the ganache a softer, sweeter chocolate taste.
- 250 g heavy cream — Use whipping-style heavy cream so the ganache sets properly.
- 60 g unsalted butter, chilled — Makes the finished chocolate filling smooth and silky.
White Ganache
- 200 g white cooking chocolate, chopped — Creates the pale surface needed for the spiderweb design.
- 75 g heavy cream — Helps turn the white chocolate into a smooth, spreadable ganache.
Note: serves several — The source recipe is designed as a generous chocolate dessert and gives enough tart for several servings.
Equipment You Need
- Food processor — Crushes the Oreos into fine, even crumbs.
- Mixing bowl — Holds the chocolate and cream while preparing the ganache.
- Heatproof bowl — Safely holds the chocolate mixture while it melts.
- 8-inch tart tin — Shapes the crust and gives the finished tart its classic form.
- Spoon — Helps press the crust firmly and spread the ganache layers.
- Piping bag or squeeze bottle — Makes the chocolate web and spider decorations easier to control.
- Baking paper — Provides a nonstick surface for making the chocolate spiders.
- Refrigerator — Chills the crust, sets the ganache, and firms the completed tart.
How to Make a Cobweb Chocolate Tart Recipe?
This is a simple no-bake chocolate tart, so most of the work involves crushing, melting, layering, decorating, and chilling. I recommend having all the ingredients measured before starting because the chocolate layers come together quickly. Take your time with the chilling stages, as they help the tart become firm enough to decorate and slice neatly.
Make the Chocolate Spiders
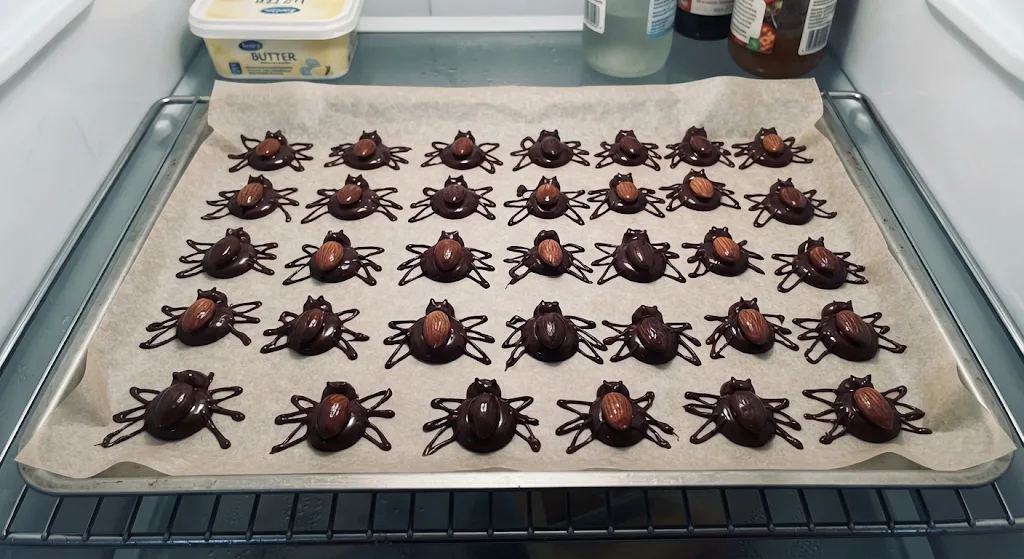
Melt the dark chocolate until smooth, then pipe small chocolate blobs onto a baking-paper-lined tray. Place a chocolate-covered almond on each blob to create the spider body. Pipe another small chocolate portion above the almond and add several thin lines for the legs.
Place the finished spiders in the refrigerator until the chocolate has completely hardened. I find it easier to make these decorations first because they can chill while I prepare the tart.
Crush the Oreos
Place the Oreos into a food processor and pulse until you have fine crumbs. If you do not have a processor, put the cookies into a sealed bag and crush them with a rolling pin.
Keep the cream filling inside the cookies. Once the crumbs are ready, add the melted butter and mix until everything resembles damp crumbs that hold together when squeezed.

Form the Tart Crust
Transfer the Oreo mixture into an 8-inch tart tin. Use the back of a spoon to press the crumbs firmly across the bottom and up the sides. Try to make the layer as even as possible. A firmly packed crust will hold the chocolate filling better and give you cleaner slices. Chill it in the refrigerator for about 10 minutes.
Prepare the Chocolate Ganache
Add the chopped dark chocolate, milk chocolate, heavy cream, and chilled butter to a heatproof bowl. Microwave the mixture in short 30-second bursts, stirring between each interval. Continue until the chocolate has melted and the mixture looks glossy and smooth. Avoid rushing this stage because gentle heating helps prevent the chocolate from becoming uneven.
Fill the Tart
Pour most of the finished chocolate ganache into the chilled Oreo crust. Reserve a small amount of ganache for creating the spiderweb later. Use a spoon to spread the filling evenly over the crust. Place the tart in the refrigerator and let the chocolate layer set completely, which takes about one hour.
Make the White Ganache
Prepare the white ganache by combining the chopped white cooking chocolate and heavy cream in a heatproof bowl. Melt it using the same gentle 30-second-burst method, stirring after each interval.
Let the mixture cool slightly before using it. Pour it over the chilled chocolate layer and spread it gently across the top for an even white surface.
Create the Cobweb
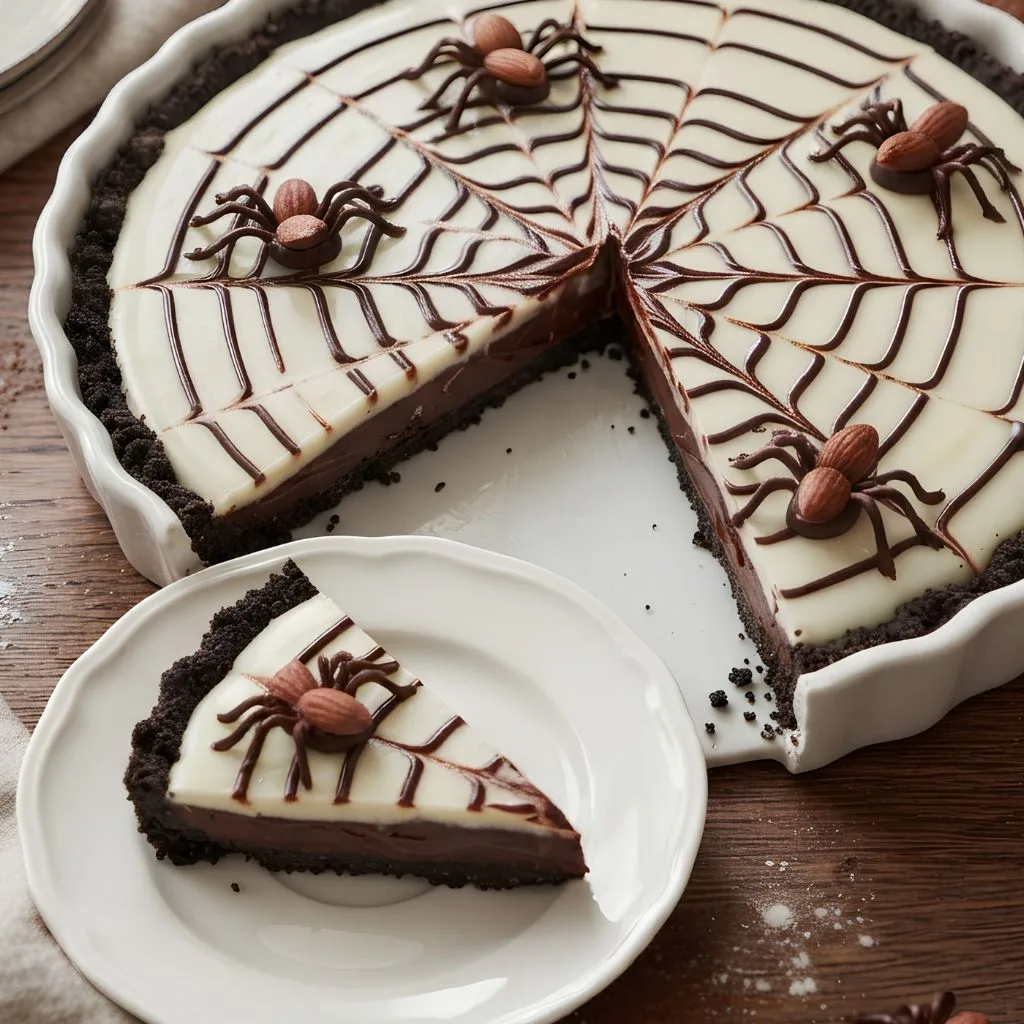
Transfer the reserved chocolate ganache into a piping bag or squeeze bottle. Pipe straight lines across the white ganache, then work from the center and add curved lines to create the appearance of a spiderweb. The pattern does not need to be perfectly symmetrical. In fact, I think a slightly handmade web gives the dessert more character and makes it look naturally spooky.
Add the Spiders
Take the chilled chocolate spiders and carefully arrange them over the tart. Place them in different areas of the web so the decoration looks playful rather than crowded. Return the tart to the refrigerator for about another hour. Once completely set, it is ready to slice and serve.
Additional Tips for Making This Recipe Better
- I press the Oreo crust very firmly into the tin because a compact base gives me cleaner slices later.
- I always melt the chocolate in short intervals and stir frequently, which helps me get a smoother ganache.
- I make the chocolate spiders ahead when possible because it gives me less decorating work at the end.
- I let the white ganache cool slightly before spreading it so it does not disturb the chilled chocolate layer underneath.
- I use a warm, dry knife when slicing because it helps me cut through the firm chocolate layers more cleanly.
- I keep the tart properly chilled until serving because the silky ganache needs time to set.
Common Mistakes to Avoid
- Weak crust: I avoid loosely pressing the Oreo crumbs because the base can crumble when sliced; I compact it firmly instead.
- Overheating chocolate: I never heat chocolate continuously for too long. Short bursts with stirring give me better control.
- Using unsuitable cream: I use heavy whipping-style cream because the source notes that light or canned cream will not set the ganache properly.
- Decorating too early: I wait until each layer has chilled and set so my spiderweb does not sink or smear.
- Messy slices: I warm and dry my knife between cuts to make the finished tart look cleaner.
How to Serve Cobweb Chocolate Tart?
I like serving this tart cold or well chilled so the ganache remains firm enough to hold its shape. For Halloween parties, I place the whole tart on a simple dark serving plate so the white spiderweb stands out.
Arrange the chocolate spiders across the web rather than placing them all in one spot. You can also make the web the main visual feature and keep the surrounding presentation simple.
For individual portions, cut neat wedges and make sure each slice shows the Oreo crust, dark chocolate filling, white topping, and part of the web. The layered look makes this chocolate Halloween dessert especially appealing.

Variations
- Peppermint chocolate tart: Add a small amount of peppermint flavoring to the chocolate element for a chocolate and mint tart variation.
- Chocolate-and-mint version: Pair the rich chocolate filling with a subtle mint note for a refreshing contrast.
- Dairy-free option: Replace the dairy ingredients with suitable dairy-free alternatives that can produce a firm ganache.
- Salt-free variation: Use the unsalted butter specified in the base recipe and keep the flavor focused on chocolate.
- White chocolate-focused tart: Increase the decorative white-chocolate element if you enjoy white chocolate tarts recipe ideas.
- Caramel twist: Add a caramel layer or caramel-flavored element for a caramel chocolate ganache tart variation.
- Extra-dark chocolate: Use a stronger dark chocolate profile if you prefer a less sweet tart filling.
Nutritional Information
The following figures are based on the source recipe’s listed nutrition per serving.
- Calories: 825 kcal
- Protein: 8 g
- Carbohydrates: 70 g
- Fat: 60 g
These figures can vary depending on the exact chocolate, cookies, cream, and portion size used.
Make Ahead and Storage
Make Ahead
I find this tart particularly convenient to prepare ahead because the chocolate spiders can be made in advance. The completed tart can also be prepared before a gathering and kept chilled until it is time to serve. Making it ahead also gives the ganache enough time to firm up properly, which can make decorating and slicing easier.
Refrigeration
Keep the finished tart in an airtight container in the refrigerator. The source recommends storing it for up to three days. Allow the tart to soften slightly before serving if it has become very firm in the refrigerator. This helps bring back a smoother texture.
Freezing
For best results, I would avoid relying on freezing for this particular recipe because the source specifically gives refrigeration as the storage method. Keeping the tart chilled preserves the intended texture of its ganache layers. If you need to prepare it ahead, refrigeration is the straightforward option supported by the original recipe.
Why You’ll Love This Recipe?
This tart combines an impressive Halloween appearance with a surprisingly simple preparation method. Here are the things I enjoyed most when making it:
- No-bake preparation: I love that I do not need to bake a pastry shell. The Oreo base comes together quickly and only needs chilling.
- Rich chocolate flavor: The combination of dark and milk chocolate gives the tart a deep, indulgent flavor, while the white ganache adds another chocolate layer.
- Fun Halloween decoration: The chocolate spiders and web turn a simple tart into a centerpiece-worthy dessert.
- Easy to prepare ahead: I can make the spiders and tart in advance, which makes this practical for a Halloween gathering.
- Customizable design: I can change the spider placement or web pattern without affecting the recipe, making every tart look a little different.
FAQs
Can I leave the Oreo cream centers in the cookies?
Yes. The original recipe uses the Oreos with their cream centers, so you do not need to scrape them out before crushing the cookies.
Can I make the chocolate spiders ahead of time?
Yes. The chocolate spiders can be prepared a couple of days ahead and kept chilled until you are ready to decorate the tart.
What type of cream should I use for the ganache?
Use heavy cream of the type normally used for whipping. The source specifically notes that canned or light cream will not provide the setting needed for the ganache.
How long can I keep the finished tart?
Store the tart in an airtight container in the refrigerator for up to three days. Let it soften slightly before serving if needed.
How can I get cleaner tart slices?
I use a warm knife for slicing. Run the knife under hot water, carefully dry it, and then make the cut; repeating this between slices helps create cleaner portions.