Halloween Black Velvet Cake Recipe: A Spooky, Moist Showstopper

I made this Halloween Black Velvet Cake Recipe when I wanted a dessert that looked dramatic but still tasted wonderfully rich and chocolatey. I loved how the black cocoa gave the cake its deep color without needing black food coloring in the cake layers.
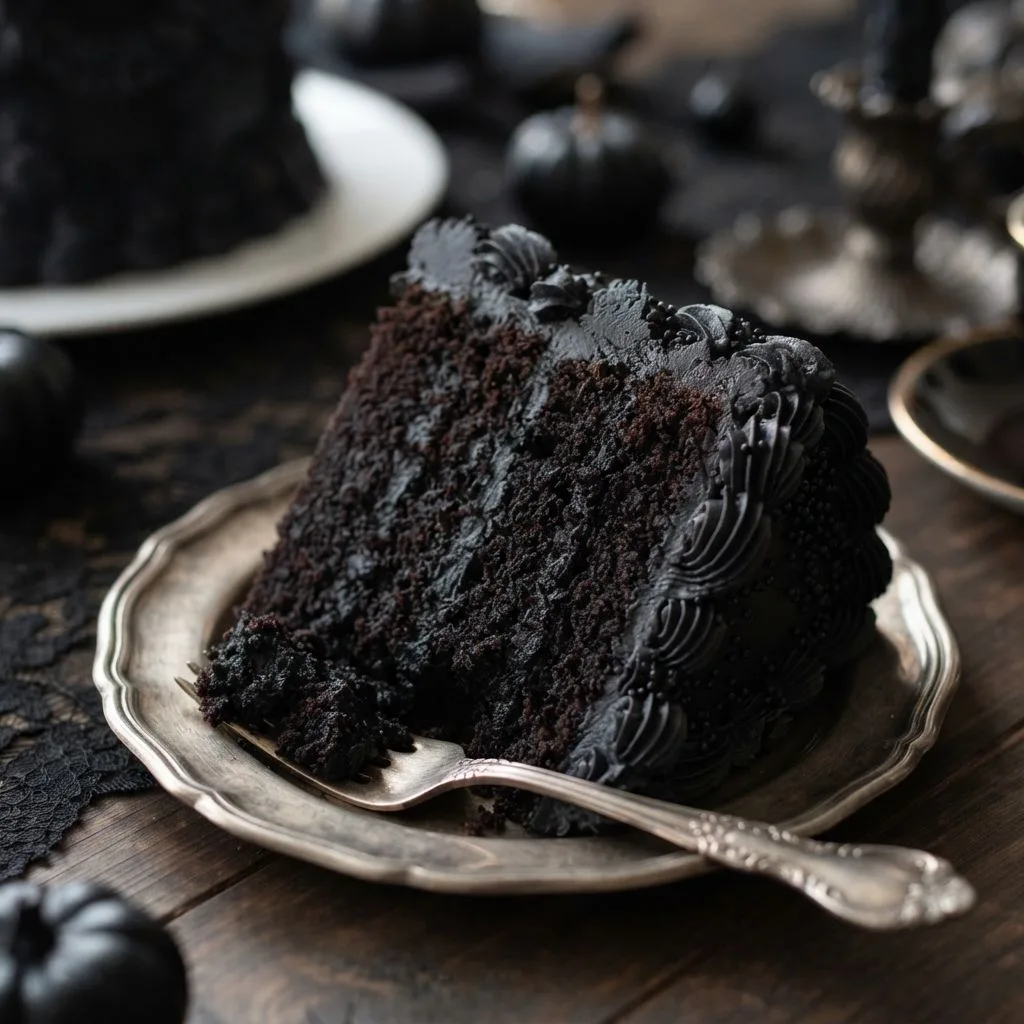
When I sliced it, the texture was soft and moist, with a delicious Oreo-like chocolate flavor. I paired the dark cake with black buttercream and decorative piping for that classic spooky Halloween look. If you love impressive cakes that are easier to make than they look, I think this black velvet cake is worth trying.

Cooking Time
The recipe makes about 15 slices and uses either three 6-inch cake pans or two 8-inch pans. The original recipe lists 45 minutes of preparation and about 32 minutes of cooking time, with the cakes needing additional cooling and chilling before decoration.
- Prep Time: 45 minutes
- Cooking Time: 32 minutes
- Total Time: About 1 hour 17 minutes, plus cooling and chilling time
Ingredients
For the Black Velvet Cake
- 2 cups (265g) all-purpose flour — Gives the cake its structure; stick with all-purpose flour for the intended texture.
- 1⅔ cups (340g) granulated sugar — Adds sweetness and helps create a tender crumb.
- ⅔ cup (80g) black cocoa powder — Creates the signature black color and Oreo-like flavor.
- 2 teaspoons baking soda — Helps the cake rise.
- 1 teaspoon baking powder — Adds extra lift and supports the soft texture.
- ½ teaspoon salt — Balances the sweetness and chocolate flavor.
- ½ cup (120ml) vegetable oil — Helps keep the cake moist and tender.
- 2 large eggs, room temperature — Provide structure and richness; room-temperature eggs mix more smoothly.
- 1½ teaspoons pure vanilla extract — Adds a warm background flavor.
- 1 cup (240ml) full-fat buttermilk, room temperature — Helps create the characteristic velvety texture.
- 1 cup (240ml) hot coffee or hot water — Loosens the batter and intensifies the chocolate character.
For the Dye-Free Black Buttercream
- 2 cups (452g) unsalted butter, room temperature — Creates the creamy base of the frosting.
- 5 cups (600g) powdered sugar — Sweetens and thickens the buttercream.
- 1 cup (112g) black cocoa powder — Provides the dark color and deep cookie-like taste.
- 4 tablespoons whole milk, room temperature — Helps loosen the frosting to a spreadable consistency.
- 2 teaspoons pure vanilla extract — Rounds out the chocolate flavor.
- ¼ teaspoon salt, or to taste — Helps balance the sweetness.
Note: serves several — about 15 slices.
If you need homemade buttermilk, the source recommends combining 1 tablespoon white vinegar with 1 cup whole milk, stirring it, and letting it sit for 15 minutes before using.
Equipment You Need
- Three 6-inch or two 8-inch cake pans — Used to bake the cake layers.
- Parchment or wax paper cake circles — Help prevent the layers from sticking to the pan.
- Stand mixer with paddle attachment — Makes both the cake batter and buttercream easier to mix.
- Mixing bowl — Useful for preparing and combining ingredients.
- Measuring cups and spoons — Help keep the ingredient ratios accurate.
- Cake leveler or serrated knife — Helps create even cake layers before stacking.
- Offset spatula — Useful for spreading buttercream smoothly.
- Piping bags and decorating tips — Used to create the Lambeth-style decoration.
- Cake turntable — Makes smoothing and decorating the sides easier.
How to Make Halloween Black Velvet Cake Recipe?
This cake comes together in three main stages: baking the black velvet layers, preparing the black buttercream, and assembling the finished cake.
The batter is intentionally quite thin, so don’t worry when it looks more fluid than a typical chocolate cake batter.
For the darkest finished appearance, allow the cocoa-based buttercream time to deepen in color before serving.
Prepare the Cake Pans
Preheat the oven to 350°F. Prepare three 6-inch pans or two 8-inch pans by spraying the sides with cooking spray. Line the bottoms with parchment or wax paper cake circles so the baked layers release easily.
Combine the Dry Ingredients
Add the flour, sugar, black cocoa powder, baking soda, baking powder, and salt to the bowl of a stand mixer. Mix everything on low speed for about 30 seconds so the dry ingredients are evenly distributed.
Add the Wet Ingredients
Add the vegetable oil, room-temperature eggs, vanilla, and buttermilk to the dry mixture. Mix on low until everything is just combined. Slowly pour in the hot coffee or hot water while the mixer continues running on low.
Mix the Batter
Increase the mixer to medium speed and beat the mixture until it becomes smooth, which takes about two minutes. The batter will be very thin, and that is expected for this recipe.
Bake the Cake Layers
Divide the batter between the prepared pans, filling them no more than two-thirds full. Bake for approximately 32–36 minutes, or until a toothpick inserted into the center comes out clean.
Cool the Cakes Completely
Let the baked layers cool completely before frosting them. This is important because warm cake can soften the buttercream and make the layers difficult to stack and decorate.
Make the Black Buttercream
Beat the room-temperature butter on medium speed for about four minutes until it becomes creamy and lighter in color. Add half of the powdered sugar and mix on low, then add the remaining sugar.
Add Cocoa and Flavorings
With the mixer switched off, sift in the black cocoa powder. Add the vanilla, milk, and salt. Mix on low for around two minutes, scraping the bowl and paddle when necessary until the frosting is thoroughly combined.
Let the Buttercream Darken
Don’t worry if the buttercream looks dark brown immediately after mixing. The source notes that it becomes significantly darker over the following several hours, eventually developing a rich black appearance.
Level and Stack the Cakes
Once the cake layers are completely cool, level them if needed. Spread black buttercream between the layers and stack them carefully. Apply another layer of buttercream around the outside as a crumb coat.
Chill the Crumb Coat
Refrigerate the crumb-coated cake for about 20–30 minutes. Chilling firms up the frosting and makes it easier to create a clean final finish.
Add the Final Frosting
Cover the chilled cake with another layer of black buttercream and smooth the surface. Refrigerate it for at least another 30 minutes before beginning the decorative piping.
Decorate for Halloween
Use the remaining black buttercream to create Lambeth-style piping around the cake. The original decoration uses layered shell borders, ruffle garlands, and overlapping shells, finished with round black sprinkles.
Additional Tips for Making This Recipe Better
These are the little things I would pay attention to when making this cake because they make the process smoother and the finished cake more polished.
- I always use room-temperature dairy and eggs. They blend into the batter and buttercream more easily.
- I would choose black cocoa when possible. It gives the cake its distinctive dark color and Oreo-style flavor.
- I don’t panic when the frosting looks brown. I give the buttercream time to darken before deciding it needs more color.
- I keep the cake chilled during decorating. Firm frosting makes smoothing and piping much easier.
- I fill the pans only to two-thirds full. This leaves room for the batter to rise without overflowing.
- I let the layers cool completely. Frosting a warm cake can make the buttercream soft and difficult to control.
Common Mistakes to Avoid
- Using warm cake layers: I always wait until the cakes are completely cool before frosting to prevent melting buttercream.
- Overfilling the pans: I keep the batter at or below two-thirds of the pan height so it has room to rise.
- Overmixing the batter: I mix until the ingredients are combined and the batter is smooth rather than continuing unnecessarily.
- Expecting instant-black buttercream: I remember that the cocoa-based frosting darkens significantly after mixing.
- Skipping the chilling steps: I chill the crumb coat and finished frosting so the cake is easier to decorate cleanly.
How to Serve Halloween Black Velvet Cake?
This cake is designed to make a visual statement, so presentation is part of the fun. Slice it once the cake is properly chilled and the buttercream has set enough to hold its decorative shape.
For a Halloween party, place the cake on a simple cake stand so the black color becomes the focus. The original recipe uses black Lambeth piping and round black sprinkles for an elegant but eerie finish.
You can also keep the decoration relatively simple if elaborate piping isn’t your style. A smooth black buttercream finish still creates a dramatic centerpiece, especially when served against a lighter cake stand or platter.

Variations
- Dark cocoa variation: The source notes that Hershey’s Special Dark Cocoa can replace black cocoa in an equal amount, although the cake will be dark brown rather than naturally black.
- Food-color variation: If using Special Dark Cocoa, black food coloring gel can be added to push the cake toward a black appearance.
- Raspberry filling: For a dramatic red-and-black Halloween cake, a raspberry filling can be used between the layers; the source specifically mentions raspberry or strawberry filling as an option.
- Oreo-inspired flavor: Black cocoa already gives the cake an Oreo-cookie-shell character, making it a natural choice for a cookies-and-cream themed dessert.
- Halloween drip: The source’s reader comments describe using red ganache as a decorative “blood drip” effect, although that is a reader variation rather than part of the original recipe.
Nutritional Information
The supplied source provides serving information but does not publish a nutrition breakdown for this recipe. Therefore, exact nutritional figures for calories, protein, carbohydrates, and fat should not be presented as source-verified values.
- Calories: Not provided in the source
- Protein: Not provided in the source
- Carbohydrates: Not provided in the source
- Fat: Not provided in the source
Make Ahead and Storage
Cake Layers
The baked black velvet layers can be prepared ahead and kept tightly covered at room temperature for up to two days. This makes it easier to split the baking and decorating over separate days.
For longer storage, wrap the layers tightly and freeze them for up to two months. Thaw them to room temperature before frosting and assembling the cake.
Black Buttercream
The finished buttercream can stay in an airtight container at room temperature for up to one day. This is useful if you want to prepare the frosting shortly before decorating.
For longer storage, keep the buttercream in an airtight container in the refrigerator for up to two weeks. Bring it back to room temperature and rewhip it with a stand mixer before using so it returns to a frosting-friendly consistency.
Reheating and Freezing
This recipe is a cake rather than a dish that needs conventional reheating, so I would not use a microwave or oven to warm the finished decorated cake. If frozen, thaw the cake layers at room temperature before assembling.
The source specifically confirms freezing the unfrosted cake layers for up to two months. It does not provide a freezing duration for the completed decorated cake, so the safest source-based approach is to freeze the layers before frosting.
Why You’ll Love This Recipe?
The appeal of this Halloween cake goes beyond its spooky appearance. It combines a dramatic color with a soft texture and deep cocoa flavor.
- It looks incredibly dramatic. I love that the black cake and black buttercream create an instantly recognizable Halloween centerpiece without relying on complicated decorations.
- The flavor is different from ordinary chocolate cake. Black cocoa gives the layers a distinctive Oreo-cookie-shell flavor that makes the cake especially appealing to chocolate lovers.
- The cake stays naturally dark. I appreciate that black cocoa provides the main color for the cake without requiring additional food coloring.
- It works for more than Halloween. The elegant black finish can also suit gothic-themed birthdays, dramatic celebrations, or an Oreo-inspired cake.
- You can customize the decoration. I can keep the cake sleek and simple or go all-out with Lambeth piping, borders, garlands, and sprinkles.
Black Velvet Cake vs Red Velvet Cake
Black velvet cake and red velvet cake share the “velvet” concept, but this recipe gets its distinctive appearance and flavor from black cocoa powder. The source explains that the term “velvet cake” historically referred to cakes with a soft, delicate texture and that modern velvet cakes commonly use buttermilk to help create that texture.
This particular black velvet version has an Oreo-like cocoa character, making it especially different from the familiar red velvet style. If you’re searching for a moist black velvet cake recipe with a strong chocolate-cookie flavor, black cocoa is the ingredient that defines this version.
FAQs
Can I make black velvet cake without black cocoa powder?
Yes, the source suggests substituting Hershey’s Special Dark Cocoa in an equal amount. However, the cake will be dark brown, so black food-color gel is needed if you want a truly black appearance.
Why does my black buttercream look brown?
I wouldn’t worry immediately. The source explains that the buttercream starts out dark brown and becomes considerably darker over several hours.
Can I use cake flour instead of all-purpose flour?
The source specifically advises against that substitution for this recipe because cake flour does not provide the same structure here. All-purpose flour is the intended choice.
Can I add raspberry filling to black velvet cake?
Yes. The source mentions strawberry or raspberry filling as a possible red filling, which can create a striking contrast against the black cake layers.
Can I make the cake ahead of time?
Yes. The cake layers can be wrapped and kept at room temperature for up to two days or frozen for up to two months. The buttercream can also be prepared ahead and stored according to the instructions above.
Final Thoughts
This Halloween Black Velvet Cake is the kind of dessert that makes people stop when you bring it to the table. I especially like the combination of the soft black cocoa cake, creamy dark buttercream, and dramatic Halloween decoration. The black cocoa does most of the visual and flavor work, giving the cake its distinctive dark appearance and Oreo-inspired taste.
If you’re searching for the best black velvet cake recipe, an old fashioned black velvet cake recipe, or simply a memorable Halloween dessert, this version gives you plenty of room to personalize the presentation. You can keep the Lambeth piping, simplify the decoration, or add a contrasting raspberry filling for a dramatic color combination.