Monster Mash Pudding Cups Recipe: Easy, Spooky Halloween Treat for Kids!

I made this Monster Mash Pudding Cups Recipe when I wanted a Halloween dessert that looked exciting without spending hours in the kitchen. I loved how quickly the pudding came together, especially because there was no baking involved. I also found that crushing the cookies was a fun little job that kids could easily help with.
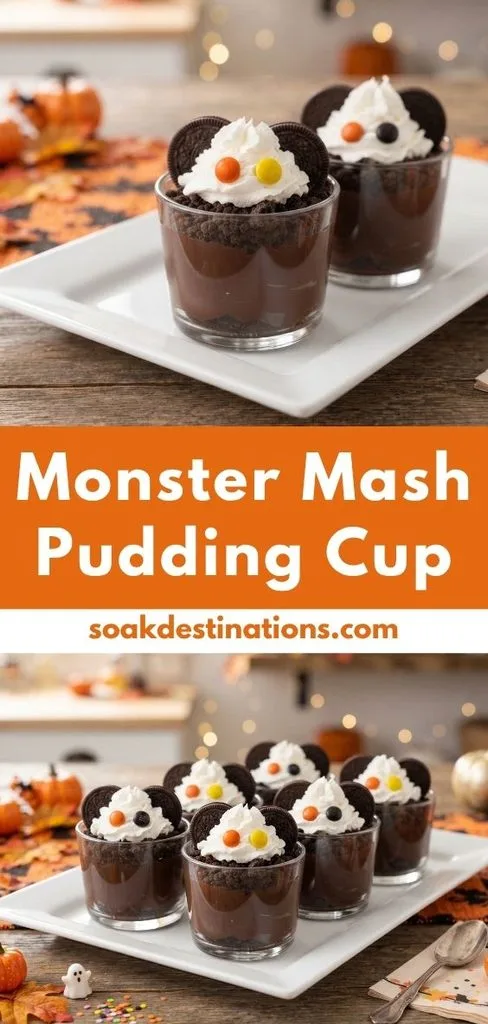
I used colorful M&Ms and chocolate sandwich cookies to turn simple pudding into playful little monsters. If you want an easy Halloween treat that is creamy, crunchy, cute, and kid-friendly, this recipe is a great choice.
Cooking Time
- Prep Time: 10 minutes
- Cooking Time: 0 minutes — this is a no-bake dessert.
- Total Time: 15 minutes
Ingredients
- 1 (5.1-ounce) package instant vanilla pudding: This creates the creamy pudding base; use the package directions for the milk amount.
- About 2½ cups vanilla or chocolate milk: Either option works; chocolate milk gives the dessert a deeper chocolate flavor.
- Whipped cream or Cool Whip: This makes the fluffy monster head on top.
- Orange, black, or yellow M&Ms: These become the monster eyes and add a colorful Halloween touch.
- 12–14 chocolate sandwich cookies: Crush some for the pudding and reserve the rest for the monster ears or horns.
Note: serves several (about 6 pudding cups).
Equipment You Need
- Mixing bowl: Use it to prepare the instant pudding and milk.
- Whisk or spoon: This helps combine the pudding mixture until smooth.
- Resealable plastic bag: I find this useful for crushing the chocolate sandwich cookies without making a mess.
- Small serving bowls or cups: These give each monster its own individual presentation.
- Refrigerator: Use it to chill the pudding briefly before decorating and serving.
How to Make Monster Mash Pudding Cups Recipe?
These pudding cups are wonderfully simple because there is no oven, stovetop, or complicated cooking involved. I prepare the pudding, add crushed cookies, chill the portions, and then decorate each one like a silly little monster. The final decorating step is where kids can really get creative.
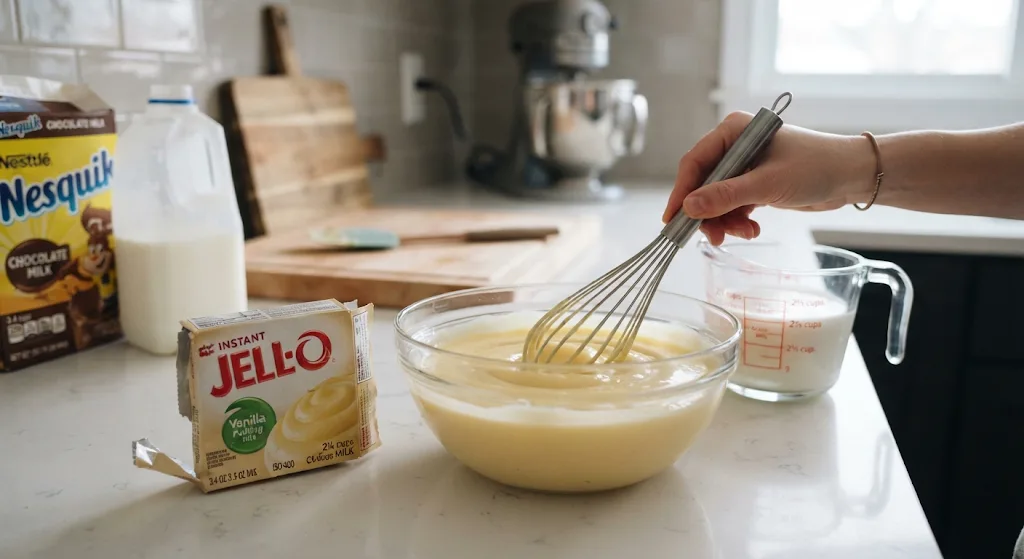
Prepare the Instant Pudding
Start by preparing the instant vanilla pudding according to the directions printed on the package. Use the amount of milk recommended by your pudding mix, which is approximately 2½ cups for the package used in the original recipe.
I like the flexibility of using either vanilla or chocolate milk here. Vanilla keeps the dessert light and creamy, while chocolate milk gives the pudding a richer chocolate character.
Crush the Chocolate Sandwich Cookies
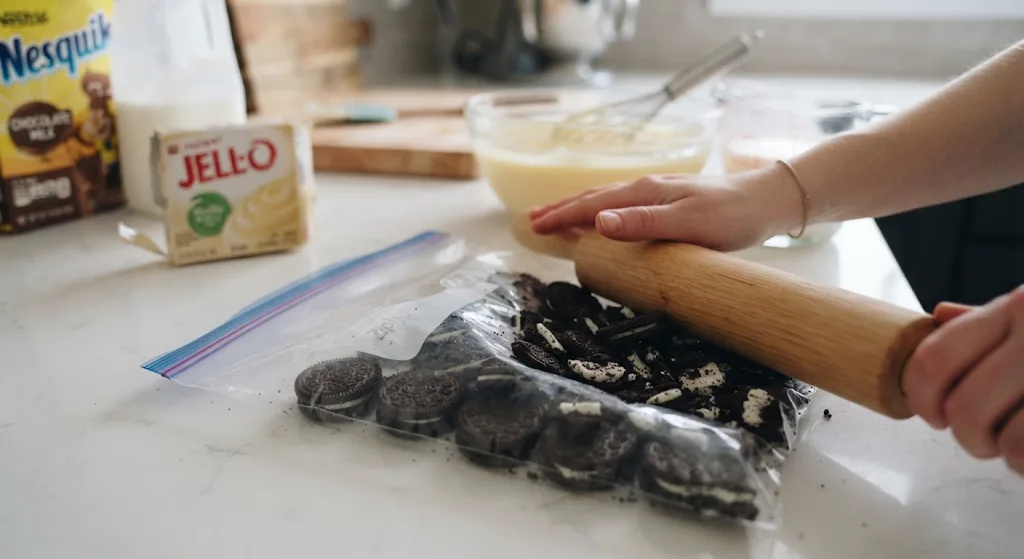
Take about 6–8 of the chocolate sandwich cookies and crush them into small chunks. They do not need to become a perfectly fine powder because a little texture makes the pudding more interesting.
I like placing the cookies in a resealable bag and gently crushing them. It is a simple step, and it can be a fun way to let children help prepare the dessert.
Mix the Cookies Into the Pudding
Add the crushed chocolate sandwich cookies to the prepared pudding. Stir gently until the cookie pieces are spread throughout the creamy mixture.
This creates the fun “dirt” effect inside the pudding cups. If you are familiar with a dirt cake recipe with chocolate pudding, the idea is similar, but these individual cups are much quicker and require fewer layers.
Portion the Pudding
Spoon the cookie-filled pudding evenly into six small serving bowls or cups. Try to divide the mixture as evenly as possible so everyone gets a similar amount.
There is no need to make the surface perfectly smooth. A slightly uneven pudding top actually works well because it gives the finished monsters a playful, homemade appearance.
Chill the Pudding Cups
Place the filled cups in the refrigerator and chill them for about 5–10 minutes, or until the pudding has set nicely.
I recommend keeping this short chilling step because the dessert is designed to be quick. The goal is simply to let the pudding firm up before adding the fluffy topping and decorations.
Add the Monster Head
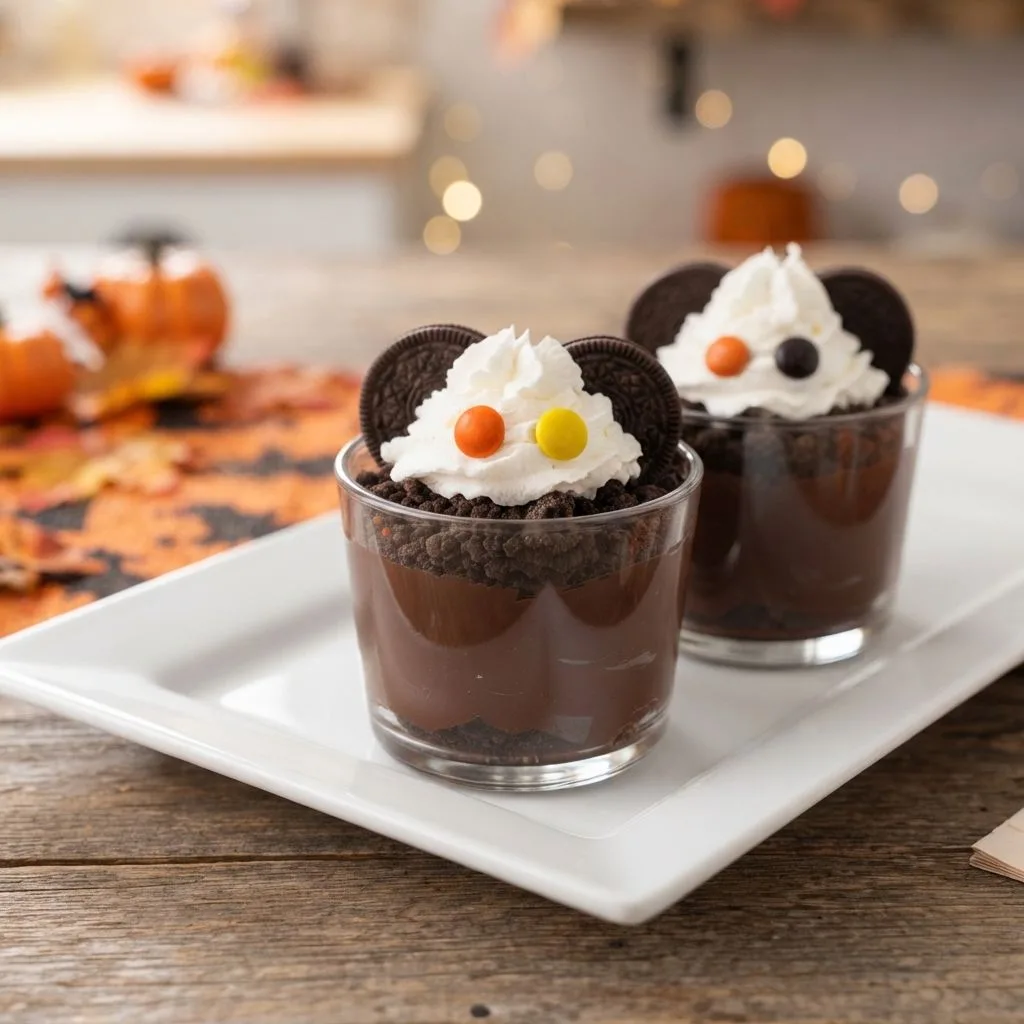
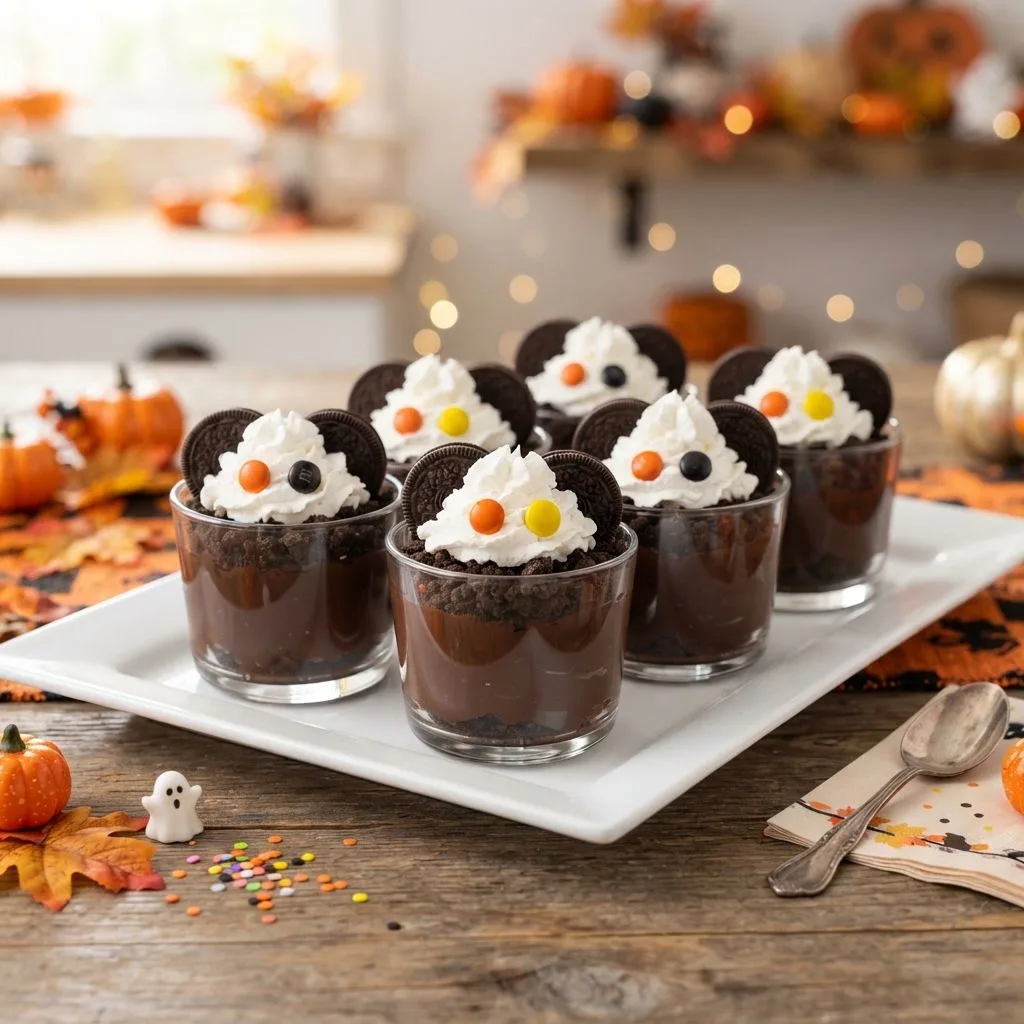
Once the pudding is chilled, spoon whipped cream or Cool Whip over the top of each cup. This fluffy topping becomes the monster’s head.
I would not worry about making every topping identical. A little messy whipped cream can make each monster look more playful and gives children room to create their own designs.
Create the Monster Ears
Take the remaining chocolate sandwich cookies and cut them in half. Place one cookie half on each side of the whipped topping.
These cookie pieces can look like ears, horns, or even little monster wings. I like letting kids decide what their creations are supposed to be because there is no need for every monster to look the same.
Add the Monster Eyes
Finish each pudding cup with two M&Ms. Place them on the whipped topping as the monster’s eyes.
Orange, black, and yellow candies work especially well for a Halloween presentation. The contrasting colors make the little faces easy to see and give the cups their spooky-season personality.
Serve and Enjoy
Serve the Monster Mash Pudding Cups immediately after decorating them. The combination of smooth pudding, crunchy cookie pieces, fluffy topping, and colorful candy makes every spoonful fun.
If you have leftovers, keep them refrigerated. These are best enjoyed fresh so the cookie pieces retain some of their texture.
Additional Tips for Making This Recipe Better
- I crush the cookies into small chunks rather than fine crumbs. This gives the pudding a more interesting texture and creates a stronger dirt-like appearance.
- I use a resealable bag when crushing cookies. It keeps crumbs contained and makes cleanup much easier, especially when children want to help.
- I keep the decorating intentionally imperfect. I find that funny-looking monsters make the dessert more charming than perfectly arranged ones.
- I chill the cups before decorating them. The short refrigerator rest helps the pudding set enough to support the whipped topping.
- I let kids choose the monster design. I use the cookie pieces as ears or horns and let everyone decide how their monster should look.
Common Mistakes to Avoid
- Using the wrong amount of milk: I always follow the pudding package directions because the liquid requirement can vary between mixes.
- Crushing every cookie too finely: I leave some pieces chunky because I prefer having a little crunch throughout the creamy pudding.
- Forgetting to reserve cookies: I make sure to save several cookies before crushing the first batch because the remaining halves are needed for the monster decorations.
- Adding the decorations before chilling: I chill the pudding first so the whipped topping sits more neatly on the dessert.
- Overthinking the monster faces: I have found that these cups look better when they are playful rather than perfectly symmetrical.
How to Serve Monster Mash Pudding Cups?
Serve each pudding cup individually so every guest gets their own little monster. Small clear bowls or dessert cups work especially well because they allow the cookie-studded pudding to remain visible underneath the whipped topping.
For a Halloween party, arrange the finished cups together on a large serving tray. Use different combinations of orange, black, and yellow M&Ms to make each monster look slightly different.
I also recommend decorating the cups just before serving. The whipped topping looks freshest, and the cookies used as ears or horns stand out clearly. Keep the presentation simple because the colorful candy eyes and cookie decorations already provide plenty of visual interest.
Variations
- Vanilla version: Use vanilla milk with the instant vanilla pudding for a lighter, classic flavor.
- Chocolate-style version: Use chocolate milk with the vanilla pudding for a richer chocolate profile.
- Extra cookie texture: Crush the cookies into slightly larger pieces if you want more noticeable crunch in every bite.
- Different monster colors: Choose different Halloween-colored M&Ms to create colorful monster faces for a party.
- Simple individual dessert: Keep the recipe exactly as a pudding cup rather than turning it into a larger layered dessert. The individual portions make serving easier.
- Dirt-dessert inspiration: If you enjoy a dirt cake with Cool Whip and pudding, these cups offer a simpler individual version built around pudding, cookie pieces, and whipped topping.
Nutritional Information
The provided source does not publish a nutrition calculation for this recipe, so exact nutritional values cannot be stated reliably without calculating them from the specific brands and quantities used.
- Calories: Not provided by the source.
- Protein: Not provided by the source.
- Carbohydrates: Not provided by the source.
- Fat: Not provided by the source.
Actual values will vary depending on the pudding mix, milk, whipped topping, cookies, and candy brands selected.
Make Ahead and Storage
Make Ahead
You can prepare the pudding mixture and portion it into the serving cups ahead of time. I would add the whipped topping, cookie ears, and M&M eyes closer to serving so the decorations look fresh and the cookies do not soften unnecessarily.
Refrigerating
Keep leftover pudding cups refrigerated. The original recipe recommends refrigerating any leftovers, and I would keep the cups covered when possible to protect the pudding from absorbing refrigerator odors.
Reheating
There is no reheating step for this dessert. I serve the pudding cold or chilled rather than warming it, since the creamy texture and whipped topping are intended to be enjoyed cold.
Freezing
I would not freeze these pudding cups as a preferred storage method. Freezing can change the texture of pudding and whipped topping, so refrigeration is the better choice for maintaining the intended creamy consistency.
Why You’ll Love This Recipe?
These Monster Mash Pudding Cups combine convenience with plenty of Halloween personality. They are especially useful when you want something festive without committing to a complicated baked dessert.
- No baking required: I love that I can make these without turning on the oven. The recipe comes together with simple mixing, chilling, and decorating.
- Quick preparation: The original recipe takes about 10 minutes of preparation and about 15 minutes overall. That makes it practical for busy Halloween parties and last-minute treats.
- Kid-friendly activity: I find the cookie-crushing and monster decorating steps particularly enjoyable for children. They can help build their own dessert instead of simply waiting for it to be served.
- Easy to customize: I can switch between vanilla and chocolate milk while keeping the basic recipe intact. The M&M colors and monster decorations can also change from cup to cup.
- Fun individual portions: Each person gets a separate little monster cup. This makes the dessert easy to distribute at parties, family gatherings, or Halloween celebrations.
FAQs
Can I use chocolate milk instead of vanilla milk?
Yes. The original recipe allows either vanilla or chocolate milk, so you can choose based on the flavor you prefer.
How do I make green pudding?
The provided recipe uses instant vanilla pudding and does not include green food coloring. If you want a green monster appearance, the source recipe itself does not provide a green-pudding variation, so adding one would be a modification rather than part of the original recipe.
Can I use Cool Whip instead of whipped cream?
Yes. The source specifically lists whipped cream or Cool Whip as the topping, so either works for creating the fluffy monster head.
How many Monster Mash Pudding Cups does this recipe make?
The original recipe yields six individual pudding cups. I recommend using small serving bowls or cups so the portions remain individual and easy to decorate.
Can I prepare these pudding cups ahead of time?
Yes, you can prepare and chill the pudding portions ahead of serving. I prefer adding the whipped topping, cookie decorations, and candy eyes closer to serving for the best presentation.
Final Thoughts
I love these Monster Mash Pudding Cups because they turn a handful of everyday dessert ingredients into something that feels special for Halloween. The creamy pudding and chocolate cookie pieces provide the base, while whipped topping, cookie halves, and colorful M&Ms transform each serving into a silly monster.
The biggest advantage is how approachable the recipe is. There is no baking, complicated layering, or elaborate decorating required. I can prepare the pudding quickly, let it chill, and then have fun creating different monster faces.
If you are searching for an easy Halloween dessert for kids, this recipe is a cheerful option to keep in your seasonal recipe collection. It is simple enough for a weekday Halloween treat but playful enough to serve at a party.