Haunted House Gingerbread Recipe: A Spooky Halloween Treat

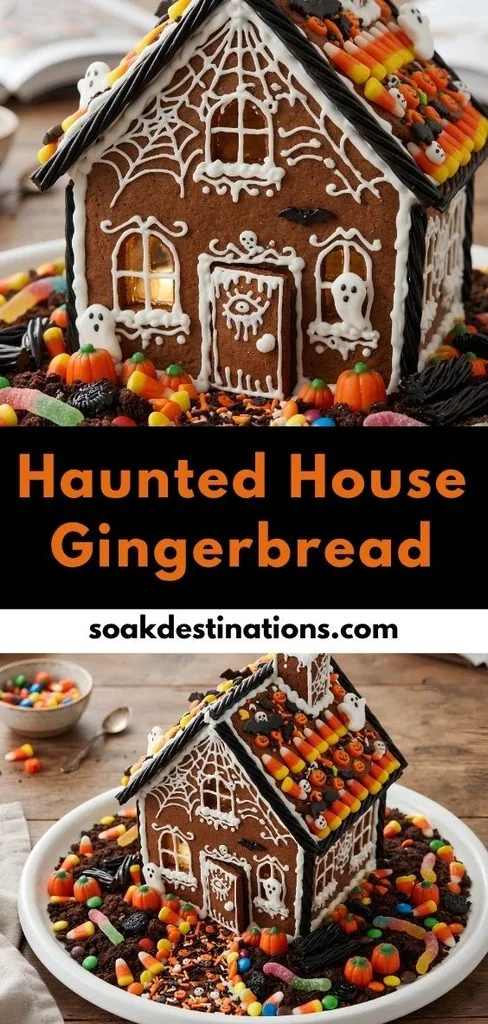
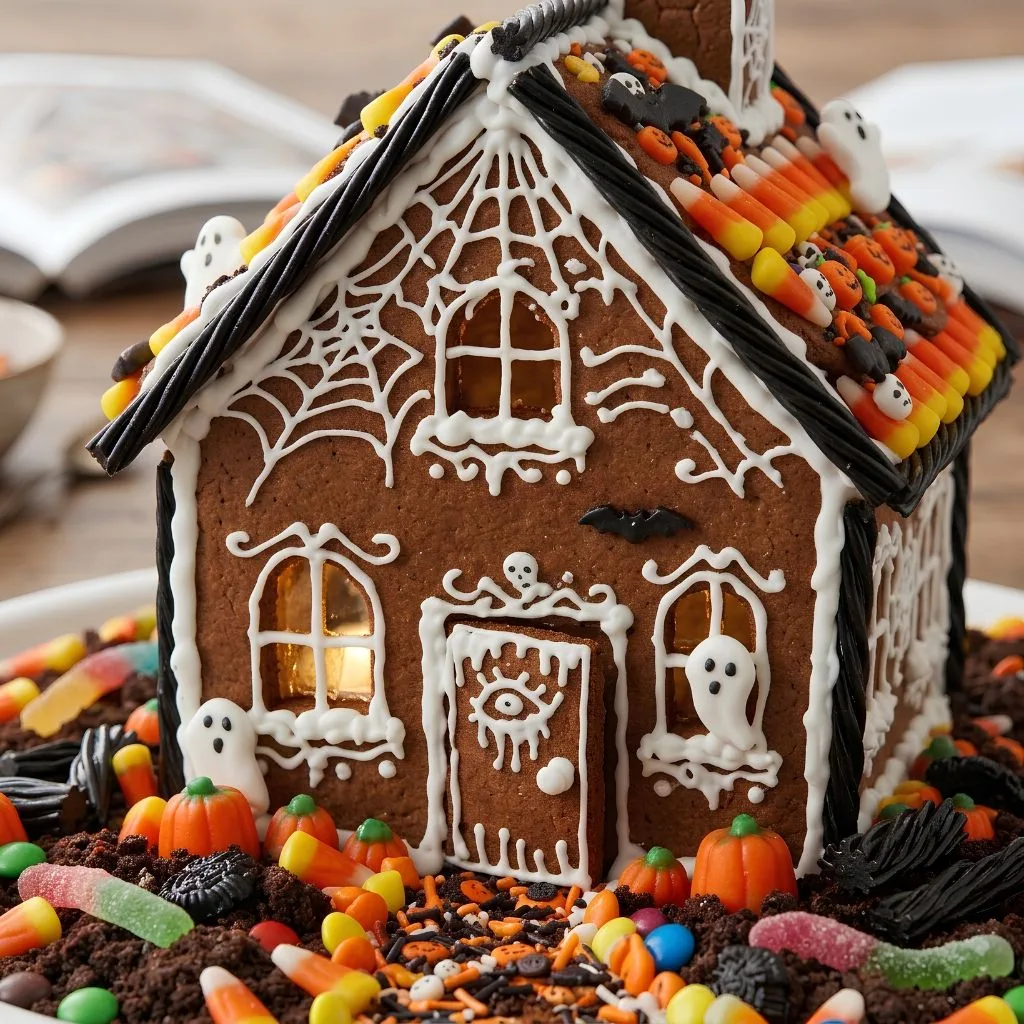
I recently made this Haunted House Gingerbread Recipe, and it turned out to be one of the most enjoyable Halloween baking projects I have tried. I loved that the gingerbread was sturdy enough to build with while still filling my kitchen with a warm, spiced aroma. I used dark icing, colorful candies, and spooky details to give my little house a wonderfully haunted look.
I also found that the slightly imperfect pieces actually made the finished house look more charming and creepy. If you enjoy hands-on Halloween baking, I think this homemade project is far more fun than simply opening a ready-made kit.
Cooking Time
This project includes baking, cooling, icing, and assembly, so it is best treated as a fun baking activity rather than a quick dessert.
- Prep Time: 20 minutes
- Cooking Time: 25 minutes
- Additional Time: 1 hour
- Total Time: 1 hour 45 minutes
The source recipe yields approximately 1–2 gingerbread houses, depending on the size of the pattern.
Ingredients
The dough is designed as construction gingerbread, so the pieces are firm and strong enough to support icing and candy decorations.
- ½ cup salted butter — Creates richness and helps bring the dough together.
- 1 cup brown sugar — Adds sweetness and contributes to the deep gingerbread color.
- 1 cup molasses — Gives the house its classic dark color and rich spiced flavor.
- 2 tablespoons ground cinnamon — Adds a warm, aromatic note.
- 1 tablespoon ground ginger — Provides the signature gingerbread flavor.
- ½ teaspoon ground cloves — Adds a deeper, slightly sharp spice.
- 1 teaspoon salt — Balances the sweetness and spices.
- ½ cup water — Helps bring the very thick dough together.
- 6 cups all-purpose flour — Gives the gingerbread its sturdy construction.
- 2 pounds powdered sugar — Forms the main body of the royal icing.
- ½ cup meringue powder — Helps the icing become firm enough to act as edible glue.
- ½–¾ cup water — Adjust gradually until the icing reaches a pipeable consistency.
- Halloween candy and sprinkles — Use candy corn, pumpkin candies, colored candies, licorice, and spooky decorations for the house.
- Black, orange, or white food coloring — Optional for creating classic Halloween-colored icing.
Note: serves several. The recipe makes enough for approximately 1–2 houses, with the source listing 12 servings.
Equipment You Need
- Stand mixer with paddle attachment — Makes the thick construction dough easier to mix.
- Large mixing bowl — Useful for preparing the royal icing.
- Rolling pin — Rolls the dough evenly to about ¼-inch thickness.
- Parchment paper — Prevents the sticky dough from clinging to the work surface.
- Pizza cutter — Makes clean cuts along larger house pieces.
- Small sharp knife — Helps cut doors, windows, and other detailed shapes.
- Baking sheets — Hold the gingerbread pieces while they bake.
- Piping bags — Make it easier to apply thick royal icing.
- Piping tip — Useful for creating decorative icing details.
- Sturdy board or covered surface — Provides a firm foundation for the completed house.
- Aluminum foil — Covers the base and makes cleanup easier.
How to Make a Haunted House Gingerbread Recipe?
This haunted gingerbread house is made in several simple stages, starting with a thick construction dough. The key is to keep the pieces evenly rolled and completely cool before assembly. Once the structure is stable, you can have fun turning the plain gingerbread into a spooky Halloween scene.
Prepare the Gingerbread Dough
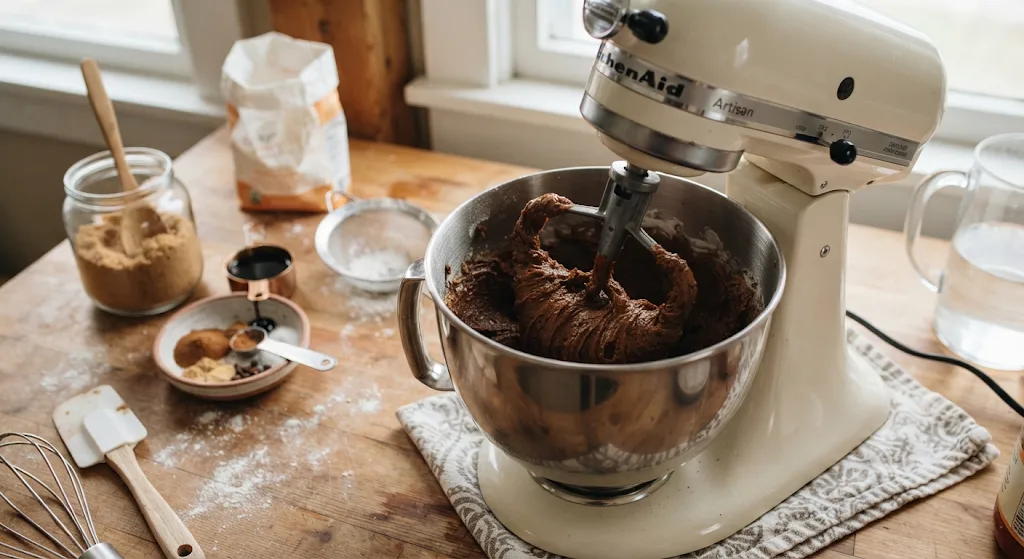
Preheat the oven to 350°F. Cream the salted butter and brown sugar in a stand mixer until combined and creamy, then mix in the molasses. Add the cinnamon, ginger, cloves, salt, and one cup of flour.
Gradually add the remaining flour while alternating it with small amounts of water. Scrape the sides and bottom of the bowl as needed. The finished dough should be very thick and firm enough to roll without chilling.
Roll Out the Dough
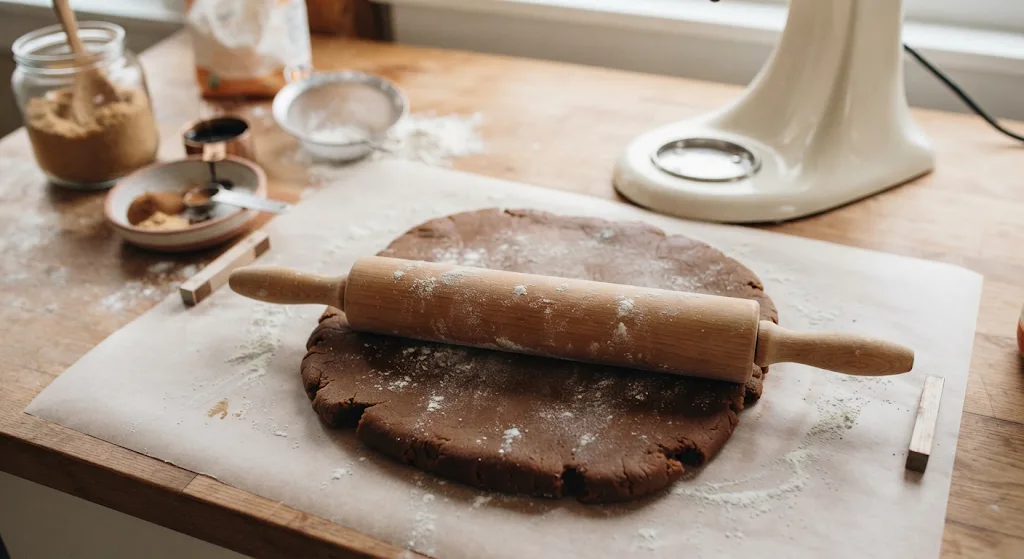
Place the dough on parchment paper and roll it to approximately ¼ inch thick. The dough can be sticky, so parchment is especially helpful for keeping it manageable.
Lightly flour the top of the dough and rolling pin when necessary. Try to maintain an even thickness because consistent pieces make assembly much easier.
Cut the House Pieces
Place your Halloween gingerbread house template over the rolled dough and carefully cut around the shapes. Use a pizza cutter for long, straight sections and a small sharp knife for windows, doors, and smaller details.
Gather leftover dough and roll it again as needed. You can also cut small Halloween shapes from the scraps to decorate the area around the house.
Transfer and Bake
Carefully move the cut pieces onto parchment-lined baking sheets. Lifting them with the parchment helps prevent the shapes from stretching or becoming distorted.
Bake larger pieces, such as the roof and front and back sections, for roughly 25–30 minutes. Smaller pieces generally need about 20 minutes. They will continue firming as they cool.
Cool the Gingerbread
Allow every piece to cool completely before you begin decorating or assembling the structure. The pieces become harder as they cool, which is important for a stable haunted gingerbread house.
If a piece still seems too soft after cooling, the source recommends returning it to the oven for additional baking so it becomes sufficiently dry and firm.
Make the Royal Icing
Combine the powdered sugar and meringue powder in a large bowl. Gradually add the water and mix on medium-low speed until the icing develops stiff peaks and can hold its shape.
Add the water slowly rather than all at once. You want icing that is thick enough to pipe while remaining sticky enough to hold the gingerbread pieces together.
Prepare the Base
Cover a sturdy board or other firm surface with aluminum foil. A strong base is important because the finished gingerbread house can become quite heavy once you add icing and candy.
Avoid relying on thin cardboard for a substantial house. A sturdy board or baking sheet provides better support during construction.
Assemble the Walls
Pipe generous lines of royal icing along the edges of the front, back, and side pieces. Bring the pieces together and hold them in position while the icing begins to set.
If you need extra support, use cans or other stable objects to prop the walls temporarily. Allow the walls several minutes to firm up before adding the roof.
Add the Roof
Once the walls feel secure, attach the roof pieces with more royal icing. Hold them in place briefly so they do not slide or collapse.
Give the structure another 10–20 minutes to settle before covering it with heavy decorations. The icing will continue to harden as it sits.
Decorate the Haunted House
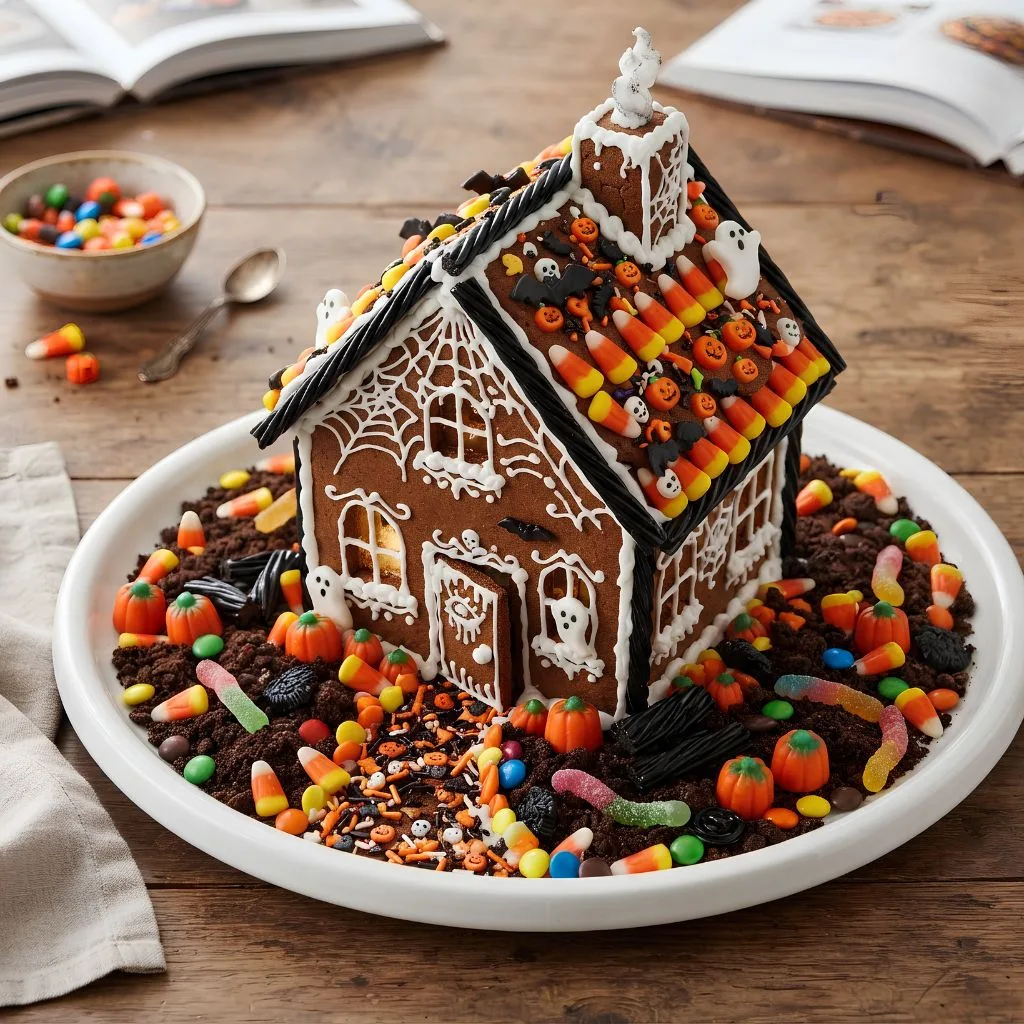
Now comes my favorite part: decorating. Pipe windows, spiderwebs, borders, doors, paths, and other details with royal icing.
Add candy corn, pumpkin candies, colorful candies, black licorice, cookie pieces, googly-eye decorations, and Halloween sprinkles. Let the design be imperfect the source specifically notes that wonky or uneven details can actually make the house look more dilapidated and spooky.
Additional Tips for Making This Recipe Better
- I always use parchment when rolling this dough because it can stick even when the work surface is generously floured.
- I find that keeping the gingerbread close to ¼ inch thick gives the pieces a sturdy feel without making them unnecessarily heavy.
- I add some wall decorations before assembly because piping detailed designs on upright walls is much harder.
- I let the structure settle before loading it with candy so the extra weight does not pull the walls apart.
- I like using plenty of decorations because this homemade version gives me much more creative freedom than a basic Halloween gingerbread house kit.
- I use leftover dough for small bats, pumpkins, or other shapes around the base to make the whole display feel like a miniature Halloween scene.
Common Mistakes to Avoid
- Rolling the dough too thin: I avoid very thin pieces because they do not feel as sturdy; keeping the dough around ¼ inch works better for construction.
- Skipping parchment: I learned that this dough can stick badly, so I always roll it on parchment.
- Using runny icing: I make the royal icing gradually and add water carefully so it remains thick enough to hold its shape.
- Decorating too soon: I wait until the walls and roof have had time to set before adding lots of candy.
- Piping details on vertical walls: I prefer decorating flat pieces first because intricate designs are much easier before assembly.
How to Serve a Haunted House Gingerbread Recipe?
This recipe is primarily designed as a Halloween display, so presentation is part of the fun. Place the completed haunted gingerbread house on its sturdy foil-covered base and surround it with extra candy or small gingerbread shapes.
For a classic Halloween gingerbread house decor theme, use black royal icing, candy corn, pumpkin candies, licorice, and colorful candy pieces. Licorice can also be shaped into spooky-looking trees, while candy pieces can become roof shingles, paths, fences, shutters, or borders.
You can also make the house the centerpiece of a Halloween decorating activity. A group can build several houses and create different themes, from cute and colorful to dark and haunted.
Variations
- Lighter-colored gingerbread: Replace the full cup of molasses with a mixture of light corn syrup, molasses, and honey for a lighter appearance.
- Very light gingerbread: The source notes that using corn syrup instead of molasses and honey produces the lightest color.
- Egg-white icing: If meringue powder is unavailable, the source provides an alternative using six egg whites.
- Spooky icing: Use black, orange, or white food coloring to create stronger Halloween decoration themes.
- Extra-spiced house: Keep the cinnamon, ginger, and cloves prominent for a warmer, more aromatic gingerbread profile.
- Candy-focused design: Add candy corn, pumpkin candies, colorful candies, licorice, cookie pieces, and Halloween sprinkles for a more elaborate haunted display.
Nutritional Information
The source provides the following nutritional information per listed serving. Because this is a construction gingerbread house with icing and candy decorations, actual nutrition can vary depending on how much decoration is eaten.
- Calories: 783 kcal
- Protein: 15 g
- Carbohydrates: 164 g
- Fat: 8 g
The original source also lists additional nutritional values, including sugar, sodium, fiber, and saturated fat.
Make Ahead and Storage
Storing Baked Gingerbread
I like making the gingerbread pieces ahead because it separates the baking work from the more creative decorating stage. The source says cooled pieces can be kept at room temperature for up to one week before decorating. Keep the pieces completely cool and protected from moisture so they remain firm and suitable for construction.
Freezing
The baked gingerbread pieces can also be frozen for approximately 2–3 months. Thaw them at room temperature before beginning the decorating and assembly process. This is especially useful if I want to prepare the house pieces well before a Halloween party or decorating activity.
Royal Icing
Royal icing is best used once it reaches a thick, pipeable consistency that can hold its shape. I add water gradually rather than over-thinning it because the icing needs to function as both decoration and edible construction glue. Once applied, the icing continues to harden, with the assembled structure becoming firmer as it sits.
Why You’ll Love This Recipe?
If you enjoy creative baking projects, this haunted house recipe offers much more than an ordinary cookie. Here are a few reasons I keep coming back to this style of Halloween baking.
- It doubles as a decoration: I love that the finished gingerbread house can become part of my Halloween display rather than simply disappearing after dessert.
- It is highly customizable: I can change the colors, candy, icing designs, house size, and spooky details to create a completely different look each time.
- It is great for families: Decorating gives children and adults a chance to work together, even if the final house is a little crooked.
- The sturdy dough is practical: The construction gingerbread is specifically designed to hold its shape and support icing and decorations.
- It works for Halloween parties: I can prepare the pieces ahead, then turn decorating into a friendly group activity or contest.
FAQs
Can I use a Halloween gingerbread house template?
Yes. The source provides a simple house design and explains that the printed pattern can be enlarged or reduced to change the size of the finished house.
Is this gingerbread house meant to be eaten?
The construction gingerbread is edible, but its main purpose is structural strength rather than softness. I would think of it primarily as a display project, although the source notes that the baked pieces can still be nibbled.
Can I make the gingerbread pieces ahead of time?
Yes. The baked pieces can be prepared about a week ahead and kept at room temperature, or frozen for roughly 2–3 months and thawed before decorating.
What can I use instead of meringue powder?
The source gives an egg-white alternative: omit the meringue powder and water and use six egg whites for the royal icing.
How can I make my haunted gingerbread house look spooky?
I would use black, orange, or white icing with candy corn, pumpkin candies, black licorice, colorful candies, Halloween sprinkles, and googly-eye decorations. You can also create spooky trees, paths, fences, windows, and spiderwebs with icing and candy.