Halloween Candy Cauldron Recipe: Easy Spooky Sweet Party Treats!

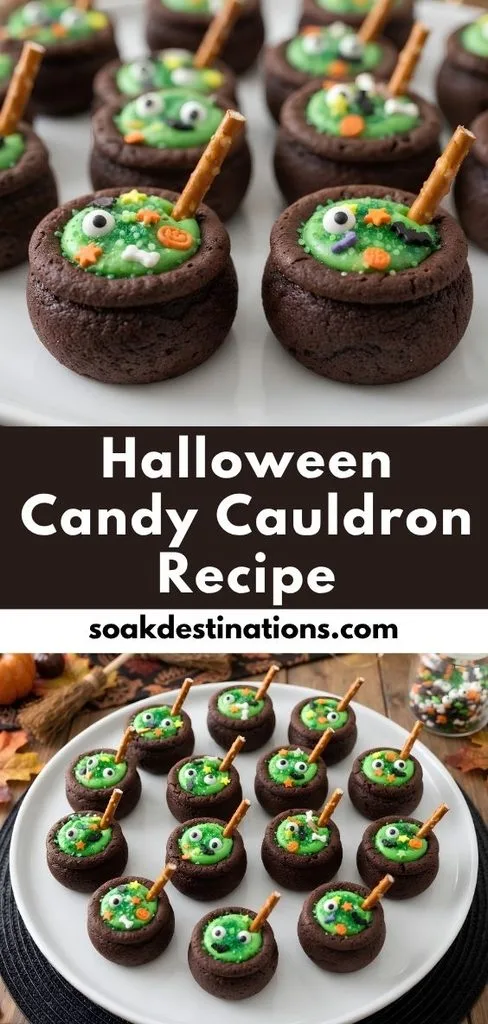
Halloween desserts are always more fun when they look a little spooky, and this Halloween Candy Cauldron Recipe is one I genuinely enjoyed making. I used chocolate cookie cups, filled them with bright green buttercream, and turned each one into a tiny bubbling witch’s cauldron.
I especially liked how easy it was to create the cauldron shape while the cookies were still warm. The candy eyes, Halloween sprinkles, and little pretzel “stir sticks” made each treat look playful and festive. If you are planning a Halloween party, I think these bite-sized treats are a fun alternative to an ordinary Halloween candy bowl.
Cooking Time
This recipe is quick enough for a Halloween party dessert, especially because the cookie cups bake in only a few minutes.
- Prep Time: 20 minutes
- Cooking Time: 8 minutes
- Total Time: 28 minutes
Ingredients
These quantities make about 36 mini Halloween cauldron cookie treats.
- 1 (15.25-ounce) box Devil’s Food cake mix – Creates the rich chocolate cookie base; I recommend using a similar-size box for consistent dough.
- 2 large eggs – Help bind the cake mix and give the cookie cups structure.
- 1/2 cup canola or vegetable oil – Keeps the chocolate cookie cups moist and tender.
- Black food coloring, optional – I use it when I want the cookie cups to have a darker cauldron appearance.
- 1 cup unsalted butter, softened – Forms the creamy base of the homemade buttercream.
- 3 cups powdered sugar – Sweetens and thickens the frosting for easy piping.
- 1 teaspoon vanilla extract – Adds a simple vanilla flavor to balance the sweet frosting.
- 1/2 teaspoon salt – Helps balance the sweetness of the buttercream.
- 1–3 tablespoons milk – Adjusts the frosting consistency so it pipes smoothly.
- Green food coloring – Gives the frosting its classic witch’s-brew appearance.
- Round green sprinkles, as needed – Make the frosting resemble bubbling potion.
- Halloween sprinkles, as needed – Add spooky color and texture to each cauldron.
- Candy eyeballs, as needed – Give the treats a fun, magical Halloween look.
- Pretzel sticks, as needed – Break them in half to create tiny cauldron stir sticks.
Note: serves several — about 36 cookies.
Equipment You Need
- Three 12-count mini muffin pans – Shape the chocolate dough into small cookie cups.
- Large mixing bowl – Gives you enough room to combine the cookie dough ingredients.
- Medium mixing bowl – Use it to prepare the smooth green buttercream.
- 1/2-tablespoon measuring spoon – Helps portion equal amounts of dough into each cavity.
- 1-tablespoon measuring spoon – Press the warm cookies to create their cauldron-shaped centers.
- Piping bag – Makes filling the cooled cookie cups with buttercream neat and easy.
- Oven – Bakes the cookie cups until their edges are set.
- Wire rack or cooling surface – Allows the cookie cups to cool completely before decorating.
How to Make Halloween Candy Cauldron Recipe?
The fun part of this recipe is turning simple chocolate cookie cups into miniature Halloween cauldrons. I recommend preparing the decorations while the cookies cool so everything is ready when it is time to decorate. The most important trick is to shape the centers while the cookies are still warm.
Prepare the Mini Muffin Pans
Preheat your oven to 350°F and lightly grease three 12-count mini muffin pans. I also keep a 1-tablespoon measuring spoon nearby because the warm cookies need to be shaped immediately after baking. Having everything ready before the cookies go into the oven makes the process much smoother.
Make the Chocolate Cookie Dough
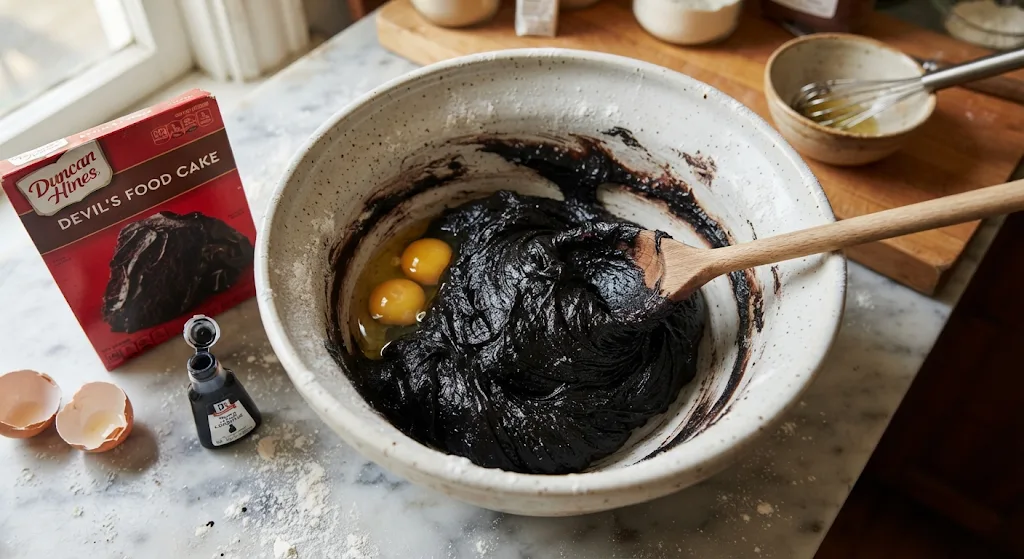
Add the Devil’s Food cake mix, eggs, and canola or vegetable oil to a large bowl. Stir until everything comes together into a thick dough, then mix in black food coloring if you want a deeper cauldron shade. The original recipe uses a 15.25-ounce cake mix, so keeping the box size consistent helps maintain the intended texture.
Portion the Dough
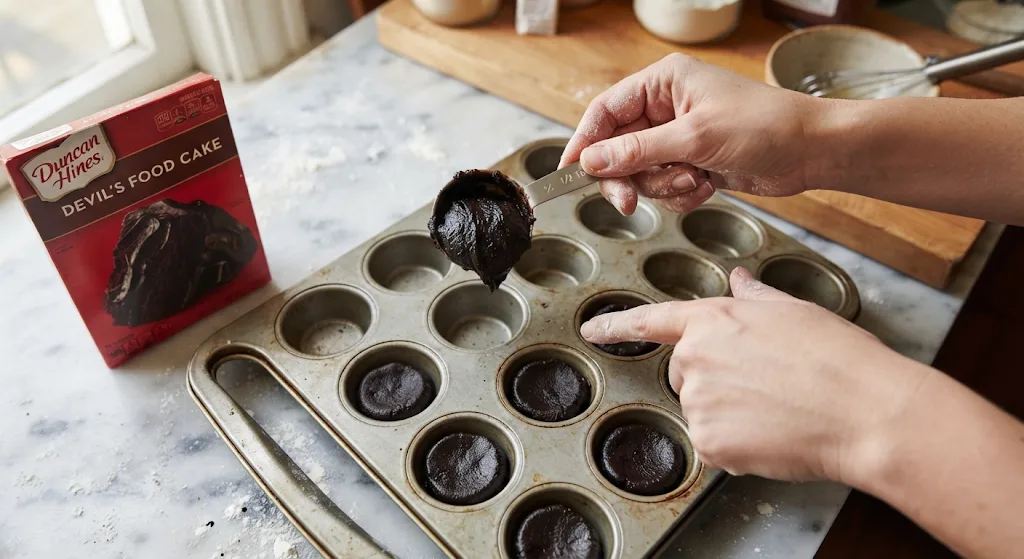
Scoop about 1/2 tablespoon of dough into each mini muffin cavity. Use your fingers to gently flatten the dough across the bottom so each cookie bakes evenly. Try to keep the portions similar because evenly sized cups will have a more consistent shape and baking time.
Bake the Cookie Cups
Bake the cookie cups for approximately 8–10 minutes, watching for edges that have set. I would avoid baking them too long because they continue to firm up as they cool. As soon as they come out of the oven, move to the shaping step while they are still soft.
Shape the Cauldrons
Immediately press the back of a 1-tablespoon measuring spoon into the center of each warm cookie. This creates the hollow space that will later hold the green buttercream and gives the cookie its little cauldron shape. Work quickly because the cookies become harder to shape as they cool.
Cool the Cookie Cups
Let the cookie cups cool completely inside the pans before removing them carefully. I find this step important because warm cookie cups are softer and more likely to break when handled. The frosting should only be added once the chocolate bases are completely cool.
Prepare the Green Buttercream
Beat the softened butter until it becomes creamy, then gradually add the powdered sugar. Mix in the vanilla and salt, followed by 1 tablespoon of milk to begin adjusting the consistency. If the frosting needs thinning, add more milk one teaspoon at a time until it is smooth and easy to pipe.
Color the Frosting
Add green food coloring gradually until the buttercream reaches the witch’s-brew shade you want. I like a vivid green because it creates the strongest bubbling-potion effect against the dark chocolate cookie. You can also choose a different potion color if you want your Halloween decorations to have a different theme.
Fill the Cauldrons
Transfer the green buttercream into a piping bag and pipe it into the cooled cookie cups. Fill the centers generously enough to resemble bubbling potion without letting the frosting spill over the sides. Make sure the cookie cups are completely cool before piping so the buttercream stays firm.
Add the Halloween Decorations
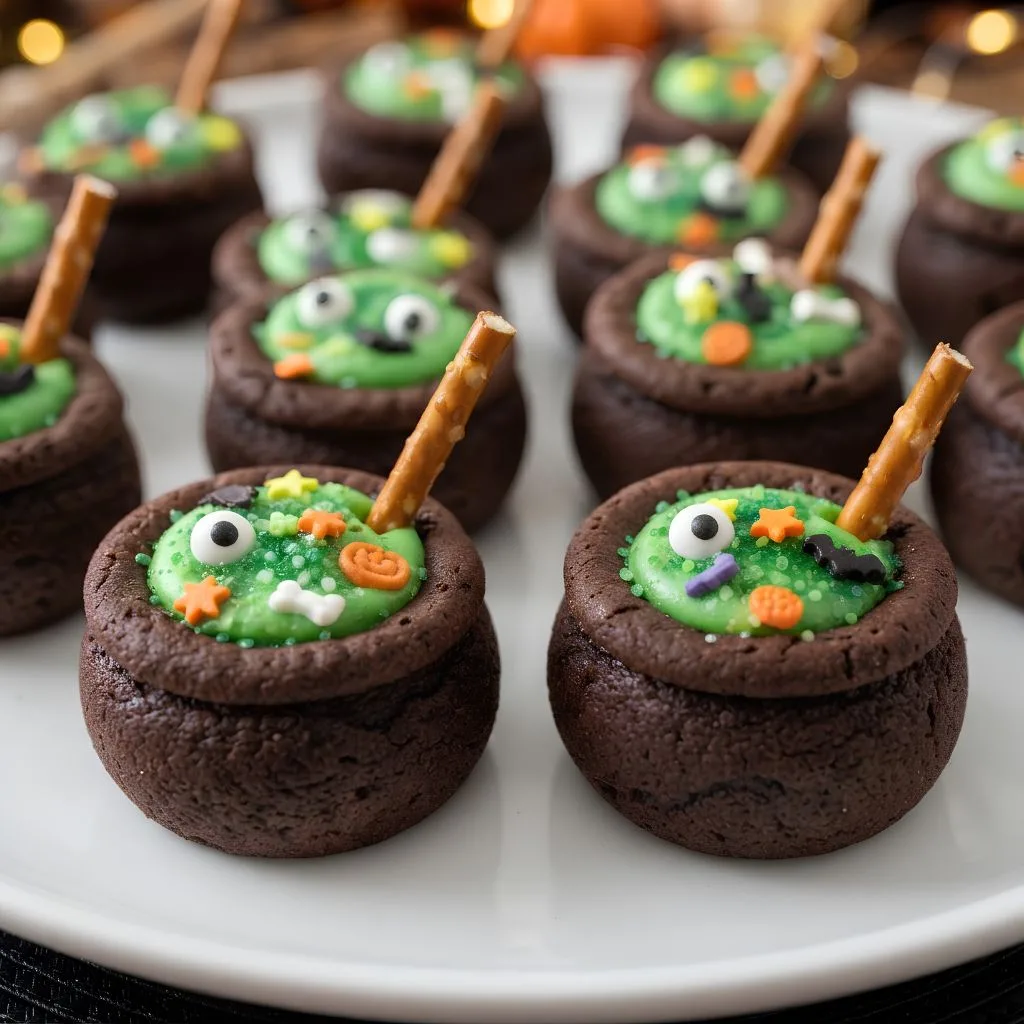
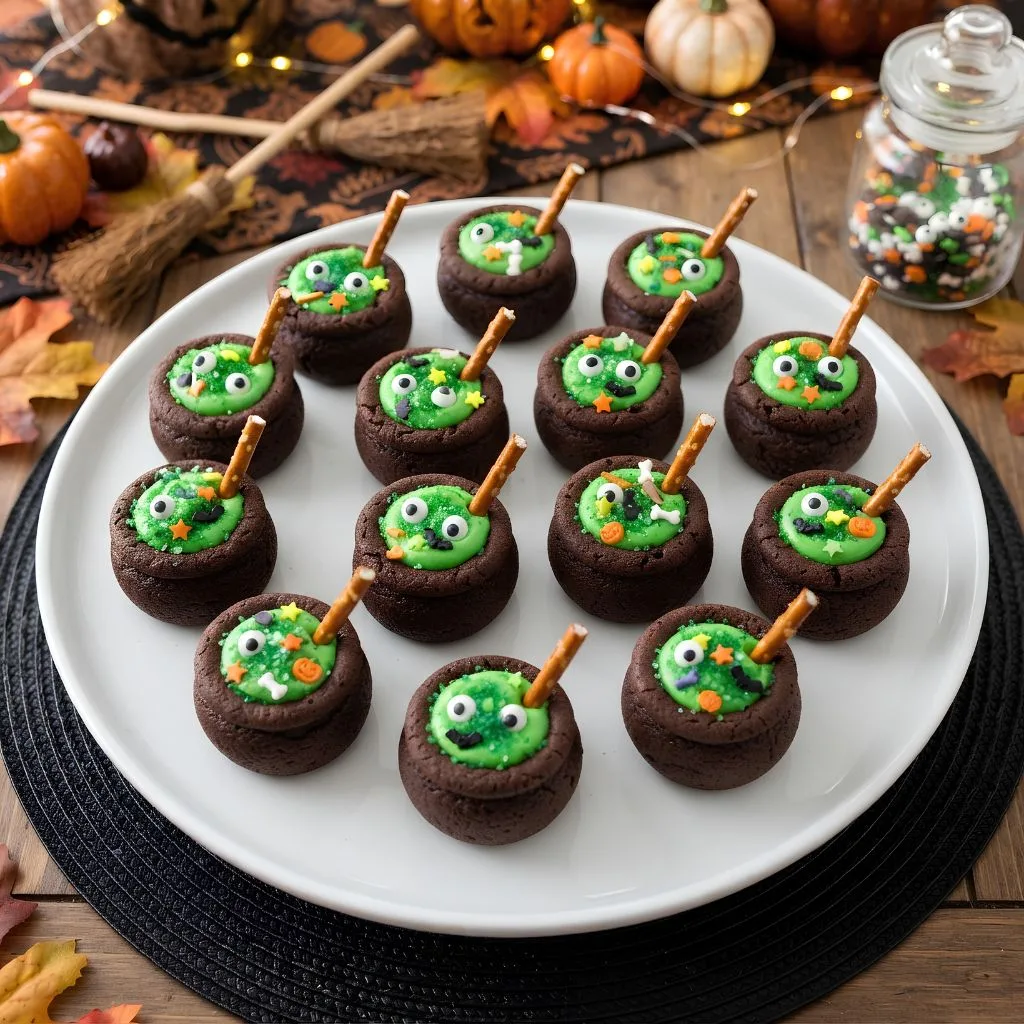
Finish each cauldron with green sprinkles, Halloween sprinkles, and candy eyeballs. Break the pretzel sticks in half and place one into each cookie as a tiny stir stick. This final step is where I think the simple cookie cups really become recognizable Halloween cauldrons.
Additional Tips for Making This Recipe Better
I found a few small details made the biggest difference when preparing these spooky treats.
- I measure the dough carefully: Using 1/2 tablespoon for each cup helps me keep the cookie sizes uniform.
- I shape the cookies immediately: The centers are much easier to press while the cookies are warm.
- I wait for complete cooling: I never rush the frosting because warm cookies can soften the buttercream.
- I adjust frosting gradually: I add milk one teaspoon at a time whenever the buttercream seems too thick to pipe.
- I enjoy customizing the decorations: Different sprinkles, candy eyes, and frosting colors can make every cauldron look unique.
Common Mistakes to Avoid
A few simple mistakes can affect the shape and finish of these Halloween treats.
- Overbaking the cookie cups: I avoid leaving them in too long because they continue firming as they cool.
- Waiting too long to make the indentation: I press the centers immediately because cooled cookies are harder to shape.
- Filling warm cookies: I always cool the cups completely before adding buttercream to prevent it from softening.
- Making the frosting too thin: I add milk gradually rather than pouring in too much at once.
- Using uneven dough portions: I use the same measuring spoon for every cup so the cookies bake consistently.
How to Serve Halloween Candy Cauldron Recipe?
These cauldron cookies are ideal for Halloween parties, dessert tables, and festive family gatherings. I like arranging them together so the green frosting looks like a collection of bubbling potions. For an especially playful display, place the cookies on a Halloween-themed serving tray and let the pretzel stir sticks remain visible.
You can also group the treats by frosting color if you make different potion shades. Green gives the traditional witch’s-brew appearance, while other colors can create a more colorful Halloween dessert table. Because each cookie is small and individually decorated, they are also easy to pick up and enjoy without needing plates or utensils.
Variations
The basic recipe is easy to customize while keeping the same cauldron concept.
- Mini brownie cauldrons: Use mini brownies as the base instead of chocolate cookie cups, then add frosting and decorations.
- Cream cheese frosting: Replace the buttercream with cream cheese frosting for a slightly tangier filling.
- Canned frosting: Use vanilla or white canned frosting when you want to simplify the preparation, then tint it with food coloring.
- White chocolate ganache: A green-tinted white chocolate ganache can replace the buttercream; allow it to thicken before filling.
- Different potion colors: Try purple, orange, or bright pink instead of traditional green.
- Decoration changes: Mix and match Halloween sprinkles and candy decorations to create different cauldron themes.
Nutritional Information
The following nutrition figures are estimates for one finished cauldron cookie and can vary by ingredients and brands.
- Calories: 168 kcal
- Protein: 1 g
- Carbohydrates: 19 g
- Fat: 10 g
Make Ahead and Storage
Make Ahead
I can prepare the buttercream the night before and keep it refrigerated until I am ready to decorate.
Before piping, I let it soften slightly and give it a good stir so it becomes smooth again.
Refrigerator Storage
Decorated cauldron cookies can be kept in an airtight container at room temperature for about 3–4 days.
For longer storage, the decorated cookies can be refrigerated for up to one week.
Freezing
The undecorated cookie cups can be frozen for up to 3 months.
I would thaw them at room temperature before adding the buttercream and Halloween decorations.
Why You’ll Love This Recipe?
These little treats combine an easy preparation process with a big Halloween presentation.
- Easy chocolate base: Starting with Devil’s Food cake mix keeps the cookie-making process straightforward while creating a rich chocolate foundation.
- Fun decorating project: I especially like that the buttercream, sprinkles, candy eyes, and pretzel sticks turn decorating into part of the recipe.
- Party-friendly size: With about 36 bite-sized cookie cups, the recipe works well when you need plenty of individual Halloween desserts.
- Easy to customize: I can change the frosting color, sprinkles, and decorations to create different potion designs.
- Make-ahead friendly: The buttercream can be prepared ahead, while the undecorated cookie cups can also be frozen for longer storage.
FAQs
Can I use a smaller box of Devil’s Food cake mix?
Yes, but the source recipe notes that a smaller 13.25-ounce box should use 1/3 cup oil instead of 1/2 cup to help maintain the intended dough consistency.
Can I make the buttercream the night before?
Yes. I can refrigerate the prepared buttercream overnight, then let it soften slightly and stir it well before piping.
Can I use a different frosting color?
Absolutely. While green creates the classic witch’s-brew effect, purple, orange, and bright pink can also create colorful Halloween potions.
Can I use brownies instead of cookie cups?
Yes. Mini brownies can replace the chocolate cookie cups, and you can finish them with the same frosting and Halloween decorations.
How long do Halloween cauldron cookies stay fresh?
Decorated cookies can be stored in an airtight container at room temperature for about 3–4 days or refrigerated for up to one week. Undecorated cookie cups can be frozen for up to three months.